And Edith Too!

Monday, June 28, 2010

Sweet Potato and Black Bean Tacos

Watch out Taco Loco. I think I may have just kicked your ass in our competition for best vegetarian tacos.

Oh, you didn't know there was a competition going on?

I see.

Well.

There was.

Your head ... er... hard candy... shell.

You're in second place. And, don't worry, I wouldn't ever even try to make a better mushroom-tofu taco than the badboys you offer. Those are super good.

Almost as good as my sweet potato and black bean tacos.

Almost.

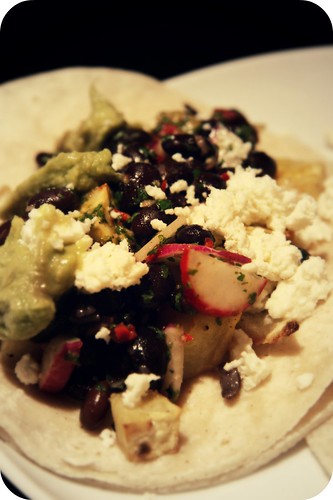
sweet potato taco close-up

So I was inspired to make these when I had some sweet potato black bean tacos at the farmer's market a couple weeks ago. The Chef Shack was offering them and everything I've ever had from the Chef Shack - purveyor of fine foods such as bacon bratwursts with bacon ketchup and Indian-spiced mini doughnuts and a soft-shell crab sandwich with grilled ramps - has been exquisite, so I had high hopes. High hopes are dangerous though, especially when you finally get to watching those movies that everyone has raved about for over a decade (e.g. Pulp Fiction and Usual Suspects), and, apparently, also when you try sweet potato tacos from the Chef Shack. Don't get me wrong. Like Pulp Fiction and Usual Suspects, they weren't bad. And the portion was large, which I always like. But they definitely didn't blow my mind or even knock my socks off. They didn't even meet my expectations. The sweet potatoes were rather plainly cooked and pureed (think baby food) and the black beans were unseasoned (think canned). The guacamole and queso fresco were the best parts - hence their appearance in the recipe herein. The idea was so good though. My mission was clear.

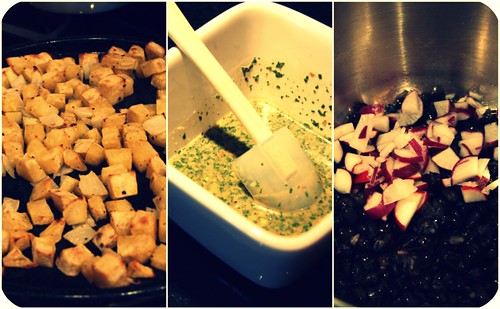
sweet potato taco collage
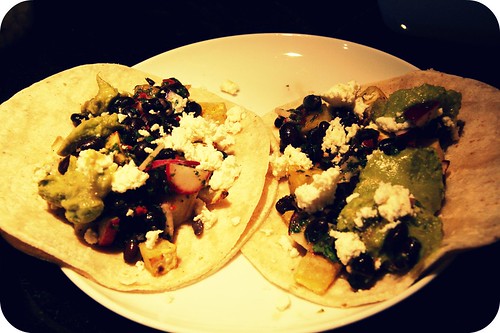
plated sweet potato tacos

Sweet Potato and Black Bean Tacos
Inspired by The Chef Shack, with some guidance from Mark Bittman* via Sassy Radish
Yield: 3-4 servings

1-2 large sweet potatoes (about 1.5 pounds), chopped into 1/2" pieces
1/2 yellow onion, coarsely chopped
salt & pepper
1/4 teaspoon cumin
4 tablespoons olive oil, divided
1 cup black beans**
5 small radishes, coarsely chopped (about 1/2 cup)
1 clove garlic
1 hot red chile, seeds removed
1/2 cup coarsely chopped cilantro
1/4 cup fresh lime juice

corn tortillas
1 avocado, sliced, or 1/2 cup guacamole
queso fresco

Preheat oven to 400 degrees. Toss chopped sweet potatoes and onion with 2 tablespoons olive oil and place on a baking sheet that fits them all in one layer. Season with salt, pepper, and cumin. Roast in oven for 30 minutes, flipping the vegetables about half-way through. Remove from the oven and let cool a bit.

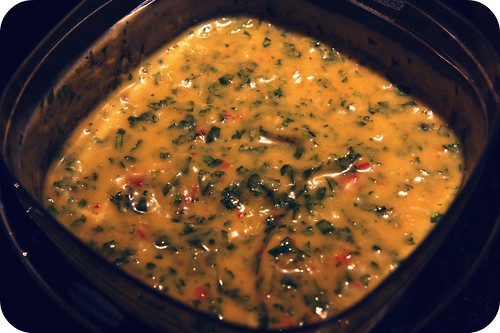
In a food processor or blender, puree the garlic, chile, cilantro, and lime juice until blended. Drizzle in the remaining 2 tablespoons olive oil and add salt and pepper to taste. In a bowl, toss the black beans and radishes with the dressing.

To assemble the tacos, fill warmed tortillas with about a quarter cup of the sweet potatoes and onion, then the same portion of black beans and radishes, top with crumbled queso fresco and avocado slices or a dollop or three of guacamole.

Great date food! No - that was a joke. These are as messy as they are tasty. Which means v. messy.

* You might need a NY Times account to see the recipe. It's a sweet potato and black bean salad recipe and sounds delicious. An account is free. (You don't need an account for Sassy Radish though, and I think she includes Mr. Bittman's recipe verbatim.)

** I have been on a dry beans kick lately, and the black beans I made for these tacos were delicious, so here's where I tell you how it worked: (1) Rinse and drain dried black beans and then put them in a saucepan and cover with fresh, unsalted water. (You want about an inch or two more water than beans.) Bring water to boil and boil for 2 minutes. Turn off stove, cover the saucepan and let the beans soak for two hours. This is a presoaking shortcut. Alternatively, you could soak them overnight without using the stove at all. (2) Drain the beans and then put them back in the pan and cover them with fresh, unsalted water again. Bring to boil, cover, and simmer for 45 minutes (you can check them at about 30 minutes). (3) Don't drain the water yet! Add 1 tablespoon salt and 1 teaspoon cumin seeds and/or 1 teaspoon dried oregano. Give the beans and seasoned water a stir and let the beans soak for about ten minutes. Drain and rinse. Now they are lightly seasoned and ready to go.

Saturday, June 26, 2010

Baked Pepper-Crusted Salmon with Absolutely Magically Delicious Mango (+ Peach) Sauce

I wasn't kidding when I said "absolutely magically delicious." This mango sauce is just really, truly, absolutely, something v. special. Perfectly sweet and herby all at once. Guest-worthy for sure. Great on salmon, possibly even better on tortilla chips, and I'm sure it would be a lovely accompaniment to pretty much anything grilled - fish, chicken, pork (do people grill pork?), hot dogs (well, okay, maybe not hot dogs, but I wouldn't judge you for trying it (yes, you, Charlotte)), tofu, maybe even summer squash or red peppers. If only we had a grill. (Sigh.)

Basically, it's what you hope to get every time you try mango salsa but end up just a little disappointed. It's perfect.

And while we're on the topic of perfect - just to clarify something about this blog - not everything I make is perfect. I mean, heck, I've made chickpea blondies. NOT PERFECT. (I believe the comments in response to those particular alterna-blondies ranged from "these were actually baked?" to "they taste like refried beans mixed with sugar".) So, yeah, I fail a fair amount of the time and I also compromise. Plus, a lot of our meals are really random. I mention all this simply to highlight that this blog is not about my random kitchen exploits. I really only put things here that I think are wonderful and worth sharing. And I try to only put things here that I've owned enough to not feel like a super poacher - though there are exceptions because, well, if I find a good recipe that's perfect as is, I might as well pass it on to people who read my blog because they probably like the same kinds of food that I like, right? It's the polite thing to do, I guess, so long as credit is given where due, and it always is. So anyway, if it seems like I'm always gushing about what I make in the kitchen, it's not because I'm consistently amazing in the kitchen or even that I think I'm consistently amazing in the kitchen. It's because I'm only sharing the gushables.

Like absolutely magically delicious mango sauce. For instance.

Other blogs do a good job testing recipes for you and eloquently, with a great deal of wit and charm, explaining why certain recipes are just not worth the effort. That's just not my bag though. Baby. If it's posted here, it was worth not only the effort of cooking it but also the effort of photographing and typing it.

And that's that.

And this is the recipe I've been withholding whilst ranting.

Enjoy.

Make sure you have a bag of good tortilla chips nearby. You know, for taste-testing along the way. Obvi.

mango sauce ingredients

(That's the mise en place photo, taken with my MacBook's Photo Booth app because my camera battery was dead.)

mango sauce

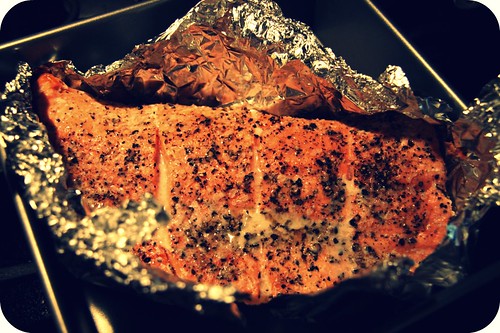
salmon

plated salmon

Baked Pepper-Crusted Salmon with Absolutely Magically Delicious Mango (and Peach) Sauce
Adapted from The Mix Magazine, May/June 2010
Yield: 4 servings, and probably some leftover sauce, unless you ate it all on those tortilla chips

1 pound filet of Alaskan wild-caught salmon
freshly ground pepper
coarse sea salt or fleur de sel

1 jalapeño or other fresh, relatively spicy red or green chile, seeds removed
2 cloves garlic
1 medium ripe mango (or, if your mango doesn't produce as much flesh as you'd like, one mango + one peach), pitted and peeled (I didn't peel the peach)
¼ teaspoon salt
¼ cup coconut milk
2 tablespoons fresh lime juice
1 cup coarsely chopped cilantro

To make the salmon, preheat oven to 400 degrees. Place salmon, skin-side down, on a large piece of aluminum foil. Coat the top side of the salmon heavily with pepper, and not quite as heavily with salt. (I actually over-salted this. I didn't think that was possible but it is. There was some scraping off the salty crust while eating. Keep in mind, as I often forget to do, that you can always add more salt later.) Fold aluminum foil to make an enclosed tent around salmon. There should be no holes, but the foil shouldn't be lying flat on top of the salmon. Mine probably had a one-inch space, and it worked beautifully. Bake for about 20 minutes, then check on it to see if it's cooked through. (I just cut into the thickest middle part to see if it was opaque. I had to bake it about thirty minutes total.)

While salmon is baking, make the absolutely magically delicious mango (+ peach) sauce. In a food processor or blender, mince the chile and garlic. Scrape down the sides of the bowl and then add the mango (and peach) and process to chop as finely as possible, for about a minute or so. Add the salt, coconut milk, and lime juice and process until smooth. Add the cilantro and pulse until it is finely chopped and well-combined into the sauce. This stores well in the refrigerator for a few days.

To serve, cut the salmon into four portions and drizzle (heavily) with mango sauce. We ate ours with peachy quinoa salad and they quite flattered one another.

Sunday, June 20, 2010

Carrot Date Sunflower Seed Muffins

I've mentioned before that I have a nut allergy. Generally not a big deal, but, on occasion, particularly the kind of occasion that involves muffins or scones or Wall Drug cinnamon rolls - the gooey, sickeningly sweet ones that you think about for five hundred miles as you drive past five hundred Wall Drug cinnamon roll billboards, the ones begging you to forget that other state you are trying to get to before sundown and just give in, pull over and taste the best cinnamon roll of your life, the ones that you throw your ETA to the wind for and you succumb to just to find out that they are actually disguised killers, unavailable without pecans or walnuts - yes, on occasions like that the allergy gets a little inconvenient.

I just love breakfast pastries. So much. So so so much.

One of the two local coffee shops I frequent, Moose & Sadie's, is among the growing number of restaurants that is hyper-cognizant of the growing number of people with nut allergies, so they label everything with great detail and they also always always always offer several no-nut treats. And then, right when you think they couldn't be more perfect, they throw in sunflower seeds in lieu of nuts, because, evidently, they know that some of us might want to occasionally experience the crunchy bits in our muffins that you nut-tolerant people probably take for granted. And then - then! - with those crunchy, non-lethal bits, you happen to get one of the best muffins you've ever tasted. And that is why Moose & Sadie's is the best place on earth. (And they don't need five hundred billboards to prove that.)

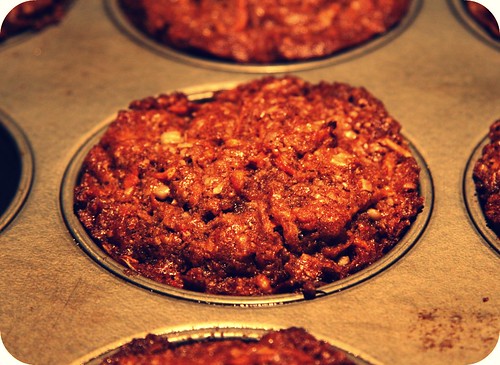
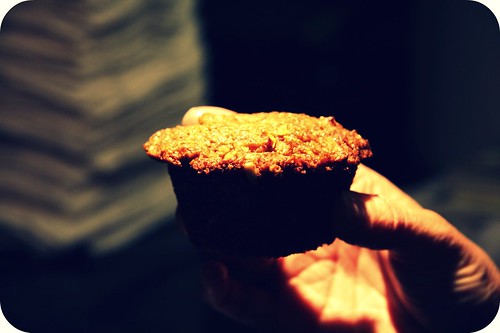
carrot muffin in pan close up

The muffin recipe below is my version of Moose & Sadie's Carrot-Date-Sunflower Seed Muffin. If I may be so bold, I'm going to go ahead and say that it is quite comparable in tastiness. And I added bran so it's healthy too, right?

(No. It's not healthy really. It's not awful, but it's not healthy. Bake and eat at your waistline's own risk.)

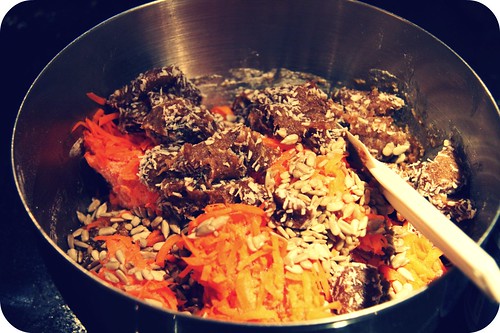
carrot muffin batter
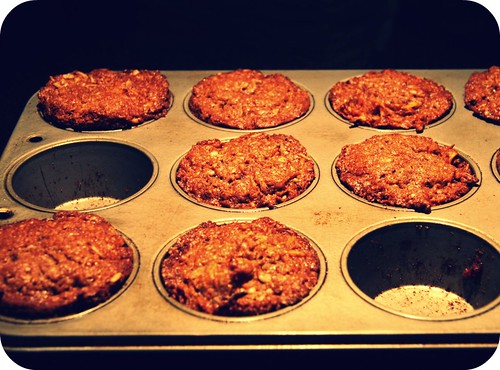
carrot muffins in pan
muffin close up

I hope you like them. I really think you will.

Carrot Date Sunflower Seed Muffins
Yield: 18 muffins
Adapted generously from this carrot muffin recipe, which I'm sure is also quite good

1 1/3 cup flour
2/3 cup oat bran
2 teaspoons baking soda
2 teaspoons cinnamon
¼ teaspoon salt
1 cup brown sugar
3 large eggs
1 cup oil
2 teaspoons vanilla
½ pound shredded carrots (about 2 medium carrots)
½ to 1 cup chopped dates (or, better yet, the coconut-covered kind at co-ops and natural grocery stores)
½ cup raw sunflower seeds (they will toast in the muffins while baking)

Heat oven to 350 degrees. Butter your muffin pan.

Mix all the dry ingredients (flour through salt) in a bowl. In a separate bowl, stir together the brown sugar, eggs, and oil until well mixed. Add the vanilla. Pour into the flour mixture. Stir in the carrots and dates and sunflower seeds.

Distribute batter in muffin pans so that each cup is about two-thirds full. Bake for 15-20 minutes, until a knife place in center-most muffin comes out clean. Let cool a few minutes before removing.

These store in an air-tight container for a good week and freeze v. well. Just microwave them for 20 seconds and enjoy.

Tuesday, June 15, 2010

Peach Brown Bettys

I can't believe I haven't posted this recipe yet! What was I thinking? I was like blah blah blah cocktails, blah blah blah quinoa and all its boring protein, blah blah blah presto pesto. But let's be honest - dessert is what we're all here for, right? I thought so.

I've been such a slacker.

I think part of it is that I gained several pounds when my parents and nephew recently visited for a week.

Another part is that I got SEVEN BAGS OF LEAFY GREENS in our first CSA share last week, so I've been sort of preoccupied with trying to use those up in blog-worthy, beautiful concoctions.

So I haven't been making as many desserts lately. But "not as many" is not the same as "none".

So here we are.

And what I have to share with you, actually, is one of the more interesting and remarkable desserts I've happened to make, maybe ever. As of a couple weeks ago, I'd never heard of a brown betty before. (Only surf bettys, because I grew up in the surfingest county in California: Santa Cruz.) But then the Smitten Kitchen featured a lovely little brown buttered brown betty recipe with strawberries that piqued my interest. Except that browning butter seemed like more work than I was up for on the day I made these. And I don't love cooked strawberries. So I went straight to the source and crafted these here darlings.


These are what I ended up making for my little dinner gathering with the peachy quinoa salad and feta sandwiches and round two of the St. Germain cocktails. They turned out delicious and attractive and were a perfect follow-up to a light, picnicky meal. Basically, they're like a buttery, unabashedly sweet, fruit-filled pastry. Topped with cinnamon whipped cream, they are nothing short of wonderful.


You should probably make them.

Peach Brown Bettys with Cinnamon Whipped Cream
Adapted from Gourmet, April 2009
Yield: 6 little lovelies

3/4 stick unsalted butter, melted (plus more for greasing muffin cups)
1 tablespoon cinnamon-sugar (you can buy this at store or just mix 3-1/2 teaspoons sugar with 1/2 teaspoon cinnamon)
7 slices fresh white bread, crusts removed (I used vanilla challah and it was wonderful; I bet King's Hawaiian bread would be super good as well)
3 peaches (or nectarines), coarsely chopped
1/3 cup brown sugar (or regular sugar, in a pinch)
1/2 teaspoon cinnamon

Preheat oven to 350°F with rack in middle. Using a blender or food processor, pulse one slice of the white bread to make coarse crumbs. Spread crumbs evenly on a baking sheet and bake in oven for 10-15 minutes, until lightly browned. Remove from oven and set aside.

Meanwhile, lightly butter six of a muffin tin's muffin cups, then sprinkle with cinnamon-sugar.

Roll remaining six bread slices with a rolling pin to flatten. Brush both sides with melted butter, then gently fit into muffin cups. (This is a little trickier than it sounds, but totally doable. Just anticipate that it will take slightly more time than you imagined, and don't freak out of they don't look beautiful in the cups before they are filled and baked into the beautiful brown bettys that they will soon be.)

In a small bowl, stir together peaches, brown sugar and cinnamon, tossing to coat. Stir in the bread crumbs and remaining melted butter. Heap peach mixture evenly into cups.

Cover pan with foil and bake 15 minutes. Uncover and bake 10 minutes more. Let stand 5 minutes before removing from pan. To remove them, run a thin spatula or knife around the edges. Serve warm or at room temperature, topped with cinnamon whipped cream. (They are better warm. But don't tell my guests that. I don't want them to know they got the short end of the stick.)

To make Cinnamon Whipped Cream: in a cold mixing bowl, beat on high speed half a cup of heavy whipping cream with 2 tablespoons sugar and 1/4 teaspoon cinnamon until fluffy and wonderful. Chill until ready to use.

Thursday, June 10, 2010

Feta and Avocado Sandwiches with Herbs and Spicy Butter Bean Spread

That title's a mouthful, isn't it? I just wanted to highlight all the important ingredients because this sandwich is SO FREAKING GOOD. And it's the combination of a lot of v. contrasting, strong flavors - cilantro, mint, feta, garlic, peppers, buttery avocado and buttery butter beans - plus all the different textures that those foods bring to the sandwich - that make it so good. It's so good I had it the next day for breakfast and then when lunch time came around I was sad because I didn't have any feta or avocado left and, well, the sandwich would be good but definitely not as good without those.


The butter bean spread (which doubles as a fantastic dip, by the way) was random. The recipe on which these sandwiches are based called for homemade hummus. (Which reminds me: note, if you're not up for making your own spread, just use store-bought hummus.) And I had a can of butter beans but no garbanzo beans in my pantry (a v. rare phenomenon indeed). I've been using a lot of beans and bean flours in my daughter's baby food lately, so I'm particularly (annoyingly) sensitive to the nuances of bean tastes and textures at present. I'm also a little tired of garbanzo beans and garbanzo bean flour (a.k.a. gram flour, chana flour, besan, chickpea, or cici flour). I looked at the can of butter beans in my pantry and thought they might make a better-tasting spread than good old hummus, homemade or not. I mean, they are smoother and milder and have the word butter in their name. And it's just different than the usual, and I always like that.


But then I thought that fresh garlic and jalapeño might be too intense for butter beans, so that's why I cooked them a bit.


And that's the story.

These sandwiches are so so so so so good. I think about them when I'm not eating them.


They photograph alright too, don't they?

Feta and Avocado Sandwiches with Herbs and Spicy Butter Bean Spread
Just slightly adapted from Bon Appétit, February 2009
Yield: 4 sandwiches

8 slices fresh, delicious, soft whole-grain bread slices
1 medium avocado, sliced into 1/4" thick pieces (you'll want about 12-16 slices)
4 ounces feta cheese, sliced into 1/4" thick pieces
1/2 a cucumber, thinly sliced
handful of cilantro
handful of mint
1/4 cup Spicy Butter Bean Spread (recipe below) or prepared hummus

Generously coat each slice of bread with the butter bean spread. Evenly distribute cilantro and mint leaves on four slices of bread. Layer cucumbers, then feta, then avocado, then some freshly ground pepper, then remaining four slices of bread on top. Devour and then think about them longingly once they're gone.

Spicy Butter Bean Spread
1 15-ounce can butter beans (or garbanzo beans or black beans)
2 tablespoons olive oil
1 jalapeño, seeds removed and coarsely chopped
2 cloves garlic
3 tablespoons fresh lemon juice
2 tablespoons tahini (optional)
salt and pepper, to taste

Rinse and drain the beans and set aside.

In a small saucepan over medium heat, heat up 2 tablespoons of olive oil. Add the jalapeño and garlic cloves and cook over medium heat for about five minutes. Remove from heat and let cool for a few minutes. Once cooled, place the cooked jalapeño and garlic into food processor bowl, reserving olive oil.

Add the beans to the food processor and mix the beans, cooked garlic and jalapeño until pretty smooth. Drizzle in lemon juice, tahini, and reserved olive oil until a spreadable consistency is reached. Add a bit more olive oil if you'd like. Season with salt and pepper to taste.

This makes about 2 cups of the spread. It is great as a dip with crackers and vegetables.

Wednesday, June 9, 2010

Peachy Quinoa Salad

Get it?

Peachy quin-oa.

As in "peachy keen" + "wa".

It's fun to be me! Really it is.

So, today's is another salad post. I know these are less interesting than desserts and cocktails. But, well, salad is an important and consistent part of my kitchen repertoire, especially throughout spring and summer. And salad can be enjoyable to eat if you put some effort into it and/or have wonderfully fresh ingredients on hand.

I wouldn't lie to you.

Salad can be amazing.

We had some friends over for dinner on Sunday. I did this thing I do quite a lot between May and October, which is serve several smaller-plate, fresh, herby foods rather than one hearty item. I made two kinds of salad (including Peachy Quinoa Salad) and two sandwiches. It was a light, summery meal that went great with the cocktails I decided to share with others after enjoying them solo the previous night.

It was a nice, casual meal. Plus the condo stayed cool because I didn't have to cook anything. And I don't have much else to say other than that everything was varying degrees of delicious and healthy and worth trying immediately. Quinoa, especially, is as good for you as it is mispronounced. It is full of protein and it's pretty. I used red quinoa here but any kind (or color, anyway) would work. Diced mangos or tangerine segments would be a good substitute for the peaches.


Peachy Quinoa
From me
Yield: about 4 cups; a side dish for 6-8

Dressing
1/4 cup olive oil
1/4 cup red wine vinegar, champagne vinegar, or apple cider vinegar
2 teaspoons honey or agave nectar or sugar
2 teaspoons lime or lemon or grapefruit juice

Quinoa
1 tablespoon olive oil
1 cup uncooked quinoa, rinsed and drained
1-1/2 cups water
1 15-ounce can (or 1-1/2 cups cooked) black beans
1 red bell pepper, chopped
1 jalapeño, seeds removed and finely chopped
1 shallot, finely chopped
2 peaches or nectarines, chopped (I used white peaches because I love them love them love them)
1/2 cup chopped cilantro

Whisk together all dressing ingredients and set aside.

In 1 or 2-quart saucepan, heat 1 tablespoon of olive oil over medium heat. Add the quinoa and saute for about a minute in the oil, stirring so that all the quinoa is coated, then add 1.5 cups water. Bring to boil, then lower heat and simmer for about 20 minutes, or until water has completely dissolved. Remove from heat, stir a bit and let cool.

Meanwhile, chop your veggies if you haven't yet.

Drain the black beans if they're canned.

Gently fold all the ingredients together. Dress with about half the dressing. Put the remaining dressing on the table for those who may want more. Garnish with fresh cilantro or mint leaves. Serve as is or over bed of lettuce tossed with 1-2 tablespoons of the dressing.


Monday, June 7, 2010

Presto! Pesto times two!

I hate when I think I have come up with a brilliant idea only to find out that not only have other people come up with the idea but they've also already posted it on their food blogs or more reputable, commercial foody websites. (I also hate that my fingers and my computer seem to have a significant relationship that fails to include me. So, as I'm typing all this in an OpenOffice.org (free Word-like software) document to cut and paste into blogger once the website is back up, the text keeps getting bigger and smaller and I am not sure why or how and now it is officially “Large Print” and I have to scroll sidewise to see the whole thing and I'm at a loss as to how to make it normal sized. As in 12 point, can-see-whole-width-of-page-at-once. My Mac is too fancy for me. I am a simple girl. No, I'm not a simple girl at all actually, but I am extremely non-mechanical and non-technical. And frustrated.)

Anyway, recently my friend Alicia emailed me a list of CSA tips. I skimmed the first few and then thought, “these lists never talk about pesto! I'm going to blog about that!” So off I went, making pestos out of everything but the kitchen sink, all the while narrating in my head the clever post that would solve every CSA member's too-much-garlic-herbs-and-greens problem. And then, in preparation for the arrival of our first CSA share this week, I went back to the list randomly one day to see if maybe the last few items actually could provide me some novel tricks to have on hand come Thursday. And I saw that, naturally, pesto-making was mentioned.

I'm not the only genius, it seems.

This discovery did not preclude this pesto post, however, because I read The Pilgrimage and one part lists a sort of beatitudes-like prayer with a bit I will paraphrase like so: “Blessed are those who don't give up on a task because someone else could do it better.” Or, in this case, has already done it [maybe, possibly, arguably] better [or at least has gotten paid to do so]. I have defeatist tendencies, so that part of the book really struck me (sort of the way Free Range Kids gets to me (in a good, healthy way) over and over again because I have paranoid hypochondriac tendencies that could potentially lead to my daughter living a Rapunzel-like existence).

And that was a really long preface to pesto.

I'm going to post two recipes here but the point of this post is not to encourage anyone to go buy these ingredients and follow these recipes precisely. No, no. The point is to liberate you from your marriage to traditional basil-parmesan-pine nut pesto. Which, you know, before I was allergic to pine nuts, I really loved. It's good stuff. But it's not the only stuff, especially if you have an herb garden and/or oversized bags of farmer's market produce and/or CSA shares that you have to make use of. Pesto-making is so handy! And it's so good and versatile. I used the two below as a pizza topping, tossed in a pasta salad with garbanzo beans, spinach and tuna, spread on a veggie-burger sandwich for lunch and on hearty crackers as a side dish with dinner, and in a small bowl as a dip with crudité.


See? Good and versatile. That's probably why I'm not the only person that thought of it.

Cilantro Pesto
1/3 cup sunflower seeds, toasted
1/3 cup pepitas (green hulled pumpkin seeds – found in refrigerated bulk section at the co-op), toasted
2 cloves garlic
1 cup cilantro (big handful or half a bunch)
½ cup fresh parsley (or other herb or more cilantro)
½ teaspoon salt
1 teaspoon Sriracha
juice from ½ or whole lemon (about ¼ cup is what you want – my lemon wasn't v. juicy, so I used the whole thing)
2/3 cup extra virgin olive oil

Sun-dried Tomato Pesto
2 cloves garlic
1 cup oregano leaves, chives, basil, parsley and/or green part of green onions
½ cup sunflower seeds or pepitas, toasted
½ teaspoon salt
5 sun-dried tomatoes, soaked in boiling water for 10-15 minutes
2-3 dried apricots, soaked with the sun-dried tomatoes
¼ cup extra virgin olive oil
2 tablespoons lemon juice

In either recipe, the method is the same: place the garlic, herbs, seeds, salt (and sun-dried tomatoes and apricots, if using) in the food processor and pulse until it forms a thick, chunky paste. Add the lemon juice and/or hot sauce, pulse a couple more times. Finally, put the food processor on properly (not pulsing), and slowly drizzle in olive oil. Use more or less oil depending on what kind of consistency you like in your pesto and/or what you plan on using it for.

Some other pesto tips:

  1. Other ingredients you might consider trying to add a little depth of flavor or nutrition to your pestos, depending on what kind of herbs you are using: capers, green olives, mustard, roasted garlic, lime juice, artichoke hearts, roasted red peppers, roasted or raw jalapeños or other hot peppers, ground flax seed, nutritional yeast, and freshly grated parmesan or asiago cheese.

  2. If you get any of the following in your CSA shares, they are ideal for pestos (and soups, but that's another post): garlic scapes (whole thing, just trim ends a bit and cut into 1-2” pieces – especially good with oregano and parmesan), sorrel, lamb's quarters, stevia, watercress, arugula, mint, and the parts of scallions or herbs that you don't otherwise use.

  3. If you have a lot of herbs or more intense greens that you'd like to use in pesto but that you find too strong to use raw, a small amount of cooking or roasting can go a long way to mellow the flavors. To do this the easy way, heat ¼ cup olive oil in a saucepan or, if you have larger greens, frying pan over a low flame. Once the oil is smoking, add watercress, oregano, arugula, peppers, garlic, et cetera. Cook for about five minutes, stirring occasionally. Remove from heat and let the oil and ingredients cool to lukewarm. Once cooled, add the produce to the food processor with your other ingredients, straining and reserving the olive oil for drizzling into the pesto at the end. If you're not up for heating, you could just let the flavors meld overnight. I made an arugula pesto a couple weeks ago, which was super bitter the first day. The arugula was v. overpowering and I regretted using it. But I never throw out food, so I kept it in the refrigerator and tried it the next day and it was much milder and quite nice. So, yeah, there's that.

  4. Oh - and if you don't have a food processor, you should get one. It is the best kitchen appliance ever invented, and you only need a v. small one, and those guys aren't too expensive.

Saturday, June 5, 2010

St. Germain-Pineapple Martini

(Warning: Posted under the influence.)

Well, what can I say? It's Saturday night. The sun is finally shining at a quarter to eight. The baby's sleeping. The husband is glued to his plants vs. zombies iPhone game. (He's going to murder me for publicly disclosing that.)

Sounds like happy hour to me!

So with the help of the google machine, my famous resourcefulness, some luck in terms of what I happened to have in my refrigerator, and a desire to finally make something remarkable with the bottle of St. Germain Elderflower Liqueur that my sister got me for my thirtieth birthday (note: I am no longer thirty), I made the concoction below.

In addition to its going straihgt to my head (wait - that's funny, right? - am leaving the typo for dramatic effect), it is taaaaaaaaaaaaaaasty. And, as a responsible nursing mother and notorious lightweight, I used only half the amount of alcohol that the foundational recipe called for. CAUTION: am nonetheless tipsy and only a quarter through my first cocktail.

... Which reminds me, one time, on our honeymoon, in Martinique, where they speak French, we saw a sign that said something in French and then had an (ill-advised) English translation below that said, "Caution to the Step!" And another time, in Switzerland, at a restaurant, not on my honeymoon, a menu said "Guacamole" on the French part and then, in the English part, it said "avocado sauce". Poor translations are never not funny. (Unless they are of religious texts. That can get a little dangerous.) ...

I am not that good at shaking drinks. Or maybe I have a bad shaker - I wouldn't know because I never shake drinks.


So I spilled.

I bet you are excited about this.

Are you excited about this?

Are you like, "Man, she's having fun! I want to have tasty fun too! Where'd I put my Elderflower Liqueur?"

Well okay then.

Go dust those martini glasses and shaker of yours.

I'll stay here.

Oh.

You're back.


Yuo're way faster than me!

Here you go.

St. Germain-Pineapple Martini
Yield: 4 martinis

1/4 cup fresh lime juice
1/2 cup pineapple juice
1/2 cup St. Germain Elderflower Liqueur
2/3 cup vodka

Fill a shaker with ice. Add all the ingredients, plus the lime rinds because that sort of feels hard core, right? Shake shake shake. Shake your booty while you're at it. It's Saturday, y'all! Baby's sleepin! Strain (carefully) into martini glasses. Savor.

Mmmmmmmmmm.

Friday, June 4, 2010

Lemon Basil Shortbread

A while back I got a phone call from my aunt, who wanted my advice about how to fancify some cookies she planned on making for a party that week. I could not have been more flattered. Because, you see, I come from a family of culinistas and entertainers, and I am one of the less talented of the bunch (we really are a bunch; I have a giant family), but she called ME! Apparently my aunt confused my resourcefulness with creativity, and given that confidence boost I came up with lemon-basil cookies and chocolate-lavender cookies. (I abruptly dismissed her idea of lemon-lavender because I think lavender in food can sometimes taste like soap, so any lavender would have to be a subtle addition to something more intense (like chocolate) and decidedly non-soapy (so the lemon was out).) I always like the combination of lemon and basil, however, so that's why I suggested she try that in her cookies, and apparently they ended up great (as did the chocolate lavender ones). Months later, I finally experimented with the combination myself.


YUM.

These are heavenly. They are melt-in-your-mouth buttery. The dried basil gives them a peppery bite that's perfectly complimented by the lemony brightness. My husband and I can't stop eating them.


But dough continues to be a bit tricky for me, so I didn't end up with two perfect nine-inch rounds (see photos below), nor was I able to score sixteen perfect wedges (id.).


Also, as you can see in the oven picture, they didn't really brown evenly. But nothing browns in my oven evenly without some sort of intervention, e.g. rotating pans or switching to convection half-way through, and I didn't intervene during this particular baking experiment because I was multitasking and keeping a watchful eye sort of went out the window. So, if you have a similar issue with your oven, go ahead and intervene as you see fit. You know your oven better than I.

(Speaking of ovens, mine is haunted. Seriously.)

Lemon-Basil Shortbread
Yield: 16-24 cookies, depending on how good you are at rolling and scoring dough

1 cup all-purpose flour
1 cup spelt flour (or another cup of all-purpose)
3/4 teaspoon salt
1/2 teaspoon baking powder
1 teaspoon dried basil
1 teaspoon lemon zest, finely chopped
3/4 cup unsalted butter, softened
2 tablespoons honey*
1/2 cup powdered sugar

Preheat oven to 300 degrees.

Whisk together flours, salt, baking powder, basil, and lemon zest.

Mix together butter, honey, and powdered sugar until slightly fluffy. On low speed, add the dry ingredients and mix until dough resembles coarse meal with some small, pea-sized lumps. Knead the dough on a lightly floured surface until it comes together. Form two evenly-sized disks with the dough.**

Between two sheets of parchment paper, roll the dough, one disk at a time, into (approximately) nine-inch rounds. Place the rounds on a silpat or parchment-lined baking sheet and score into eight wedges per round, or, you know, cut in random shapes. (If both rounds don't fit on your baking sheet, just bake one at a time.)

Bake shortbread until golden brown, about 20-25 minutes. Let cool for about 5 minutes and then cut along score-marks with a large, heavy knife.

*I actually didn't have honey, so I used one tablespoon of lime syrup (I am the queen of random ingredients!) and one tablespoon of corn syrup. I think honey would taste different but be just as good. I am going to make these again soon with one tablespoon of honey, one tablespoon of lime syrup, and 1/2 teaspoon cayenne in place of lemon and basil. They sell something similar at our local market and I love them.

** I might try making one or two logs of dough next time, refrigerating them for 20 minutes, and slicing them. The only other time I made shortbread that method seemed to work fine.