And Edith Too!

Saturday, October 30, 2010

Mexican Whole Beans

This post is part of a handful of posts that I'm working on in preparation for my upcoming Ten Days series. It is going to be Ten Days of Pumpkin, but you'll have to be flexible with me because a handful of the posts will feature other winter squash, and I didn't like the sound of "Ten Days of Winter Squash."

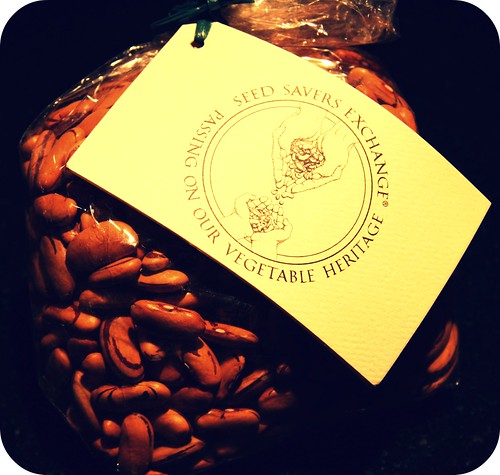
The dried beans I used to make the soupy, Mexican-restaurant-style ones described below were from an Iowa heirloom bean grower/vendor called Seed Savers Exchange. I'd had a Rancho Gordo sample box on my Christmas list for a couple years now, but apparently nobody took that request seriously, so I decided to buy them for myself. After doing a bit of research, however, I found Seed Savers Exchange, for which I opted over Rancho Gordo because it's nearer to Minnesota and has a comparable (or maybe even greater) selection of heirloom beans. I bought about ten pounds of various beans. They arrived within two days of ordering online and they are all beautiful and unique. I'd been working through them slowly until I read recently that beans should be used within a year of harvest, and that's galvanized more bean-making in our home lately. I shouldn't need an expiration date to motivate me, though. I love beans, and they are so simple to make, and you can do so many things with them. My experience with Seed Savers Exchange was awesome, so if you are interested in ordering heirloom beans, I highly recommend the company.

Seed Savers beans

I used Tiger's Eye beans, which are beautiful when dry. When cooked, they look and taste like oversized, creamy pinto beans. They were a good choice, if I do say so myself.

Tiger's Eye

The recipe I played with to make these beans is an Emeril recipe from Foodnetwork.com. Emeril mashes them and makes them "refried" style, and you can too, but I did not.

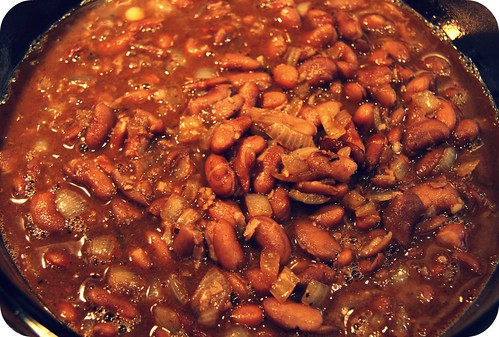
Pot-o-beans

I love whole beans in all their soupy, salty glory. Good thing, since the recipe makes a lot of them, so beans made an appearance in several dinners the week I made them. They shine best in simple dishes: arroz con pollo or weeknight huevos rancheros (bonus recipe following the bean recipe). But you'll read about a fancier way of using them when I finally get to my Ten Days of Pumpkin...

Mexican Whole Beans
Adapted from Emeril Lagasse
Yield: 4-5 cups

1 pound dried pinto (or pinto-like) beans, soaked overnight in a large bowl with water to cover by 2-inches, and drained*
1 bay leaf
1 quart chicken or vegetable broth
2 tablespoons bacon drippings (or lard or butter or olive oil)
2 tablespoons butter or olive oil
1 large onion, chopped
5 cloves garlic, chopped
1 tablespoon chili powder
2 teaspoons ground cumin
1 teaspoon ground coriander
1 teaspoon dried oregano or epazote
1 teaspoon salt
1/2 teaspoon cayenne

In a medium, heavy pot or dutch oven, combine the beans, bay leaf, and enough broth to cover by about one inch (about 4 cups). Bring to a boil. Lower the heat and simmer uncovered, stirring occasionally, until the beans are very tender, about 1 1/2 to 2 hours, adding more broth or water as necessary to keep the beans always covered. When the beans are soft, remove pot from heat.

In a large, heavy skillet, melt the bacon drippings and butter (or whatever combination of fat you choose to use) over medium-high heat. Add the onions and cook, stirring occasionally, until soft, about 3 minutes. Add the garlic, spices, and salt, and, stirring constantly, cook until fragrant, about 1 minute.

Remove the bay leaf from the beans. Pour the onion-garlic mixture into the beans and stir to combine. Cook on low, stirring occasionally, until the flavors combine and the mixture thickens, about 5 to 10 minutes. If needed, add a tablespoon of water at a time to keep the beans from getting dry. (I didn't have to do that.)

*A soaking shortcut is to cover the beans with water, bring to boil, boil for 2 minutes, turn off the burner, cover, and let them soak for 2 hours. Drain, rinse, and then start recipe.

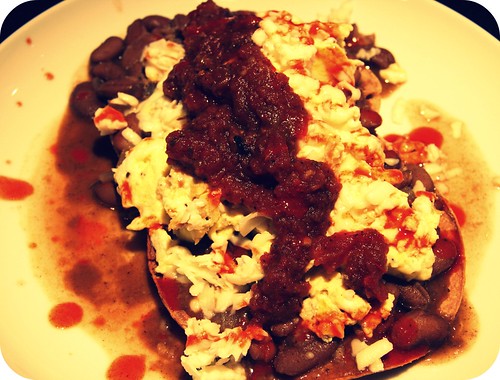
huevos rancheros

Weeknight Huevos Rancheros
From yours truly
Serves 2

4 corn tortillas
4 eggs
1 cup (or more) Mexican Whole Beans
1 cup shredded cheese or crumbled queso fresco
olive oil (in a spray bottle is best)

Toppings: salsa, hot sauce, sour cream, guacamole, cilantro

Preheat oven on broil setting. Spray or brush olive oil on both sides of each tortilla. Place tortillas on baking sheet and broil for 2 minutes on each side, until firm and toasty.

In a nonstick skillet, cook your eggs however you like them best. Season with salt and pepper. Reheat Mexican Whole Beans if necessary.

When tortillas are done baking, place one egg on each tortilla and, using a slotted spoon, top with 1/4 cup whole beans, followed by 1/4 cup cheese. If you like your cheese melty, place under broiler again for another minute. Otherwise, top with fixings of your choice and dig in.

Wednesday, October 27, 2010

Apricot Honey Cookies

"These cookies taste like Christmas."

That's what my husband said when he first tried them, and he's right. And if stores can be reminding us that Christmas is on its way, then I suppose my kitchen is allowed to as well. Especially because cookies are probably one of the best parts of Christmas, and these are lovely little cookies indeed. They aren't Christmasy in the way that a gingerbread latte is. On the contrary, these are delicate and subtle. The flavors are mild but warm. Nice with a hot beverage as you watch outside your window the season's first flakes of snow intermingling with rain, and the bright yellow leaves that were part of a tree just yesterday dancing in the insane wind that has just taken over your city.

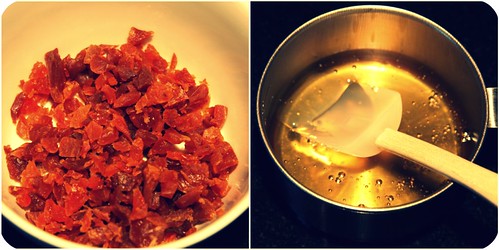
apricots and honey

There's not much else to say about these cookies. They're nothing to gush or mull over. They are just nice, simple little two-bite treats. Or one bite treats, depending on which of the two methods I describe most suits your fancy.

Exhibit A: Quick and Easy Version

ball cookie

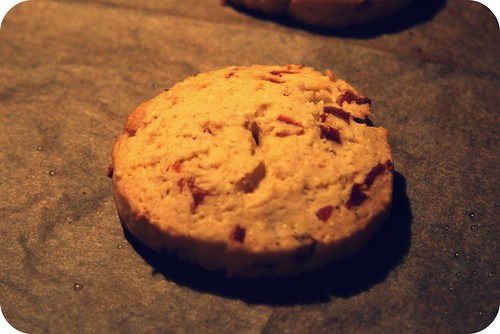
Exhibit B: Rolled, Chilled, and Sliced Version

cookie disk

I think I preferred the quick and easy version. They were a little softer, and you could pop them into your mouth whole, which is fun, and they were ready quickly. But the more involved version definitely looks more involved, and is certainly as delicious as the former, so if you want the less rustic, more polished look, go for the rolled, chilled, and sliced version.

Or do both.

cookie comparison

I altered a recipe from David Lebovitz to make these. My alterations are as follows: I halved the recipe because I don't need 50 cookies hanging around my house (although, I think either his recipe yields way more than 50 cookies or he made much larger cookies than I did, because I already made over 20 and I have half of my own dough in the freezer still); I substituted honey for sugar, because I think honey and cornmeal go together v. nicely (e.g. cornbread + honey butter); and I, of course, used dried apricots in place of currants. My cookies look much softer than his, and I imagine it's because of the honey. Also: I've almost used the last of my dried apricots! Yay!

I have to go get a Christmas tree now. Enjoy the recipe.

Apricot Honey Cookies
Adapted from David Lebovitz
Yield: about 50 small cookies

1/2 cup finely chopped dried apricots
1 tablespoon flour

2.5 ounces butter, softened (about 5 tablespoons)
1/4 cup honey
1 egg
1/2 teaspoon vanilla
3/4 cup flour
2/3 cup stoneground, coarse cornmeal
1 teaspoon baking powder
1/2 teaspoon salt

If you plan on making the easy version, preheat oven to 325 degrees. If you make the more polished version, preheat the oven about fifteen minutes before you plan on baking them.

In a bowl, toss the dried apricots with the 1 tablespoon flour and set aside.

In a mixing bowl, cream together the butter and honey. Add the egg and vanilla and stir until well-combined and a little fluffy. In a separate bowl, whisk together flour, cornmeal, baking powder, and salt. Add dry ingredients to wet, stirring until incorporated, and then stir in the dried apricots.

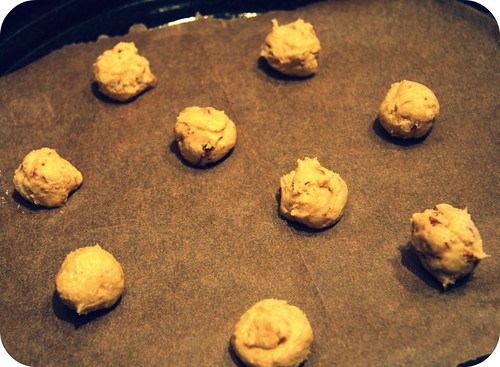
To make the easy, quick version, form walnut-sized balls out of the dough (about 1 tablespoon) and place them on a parchment- or Silpat-lined cookie sheet, like so...

cookie dough balls

The dough will be quite sticky, so you might want to flour your fingers a bit.

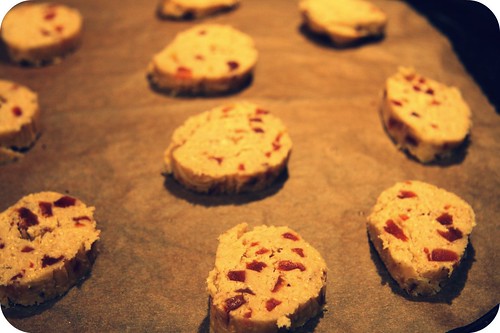
To make the rolled, chilled, and sliced version, place a sheet of plastic wrap on the counter, then gather the dough into one large ball and place it in the center of the plastic wrap. Fold up the edges to create as much of a disk-type shape as you can. Put the disk in the refrigerator and chill for about an hour. Once the dough has chilled and is solid enough to handle, remove from the refrigerator and unwrap. Using your hands, shape the dough into a tube, about 2" in diameter. Wrap and chill again for about an hour. (Or freeze the dough for later - this is what I did.) When you are ready to bake the cookies, slice them about 1/4" thick and place them on a parchment- or Silpat-lined cookie sheet.

cookie dough disks

Regardless of which version you opt to make, bake for 10 minutes. (Even using the frozen dough, they still took only 10 minutes.) Allow to cool on cookie sheet for a few minutes. Get your hot beverage ready and enjoy.

Tuesday, October 26, 2010

Out-of-Eggs French Toast

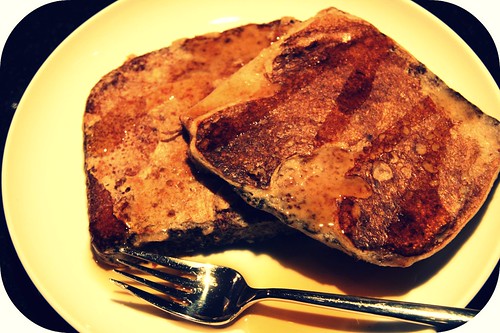
I'm not vegan. You probably noticed that. But sometimes I do enjoy the simplicity and wholesomeness that a vegan meal offers and other times I just run out of eggs, so I find myself a few times a week looking to my vegan cookbooks for guidance, whether I'm trying to cleanse or make do. The vegan french toast recipe below falls into the latter category. My daughter, who isn't a huge fan of meat or beans yet, loves eggs. So every morning I give her either a scrambled egg or french toast for breakfast. This means we go through (and accordingly run out of) eggs rapidly in the Cameron household. I sorted out this little recipe the last time I found myself in a no-egg predicament. While it lacks the protein I prioritize in Sadie's most important meal of the day, it's nonetheless super tasty. So if you're vegan, or if you're simply out of eggs, knock yourself out.

Note: this makes a super small batch. It was enough for me and my daughter, who's not quite 16 months old. Granted, I eat a lot, so it's probably enough for two adults when you take that into consideration. At any rate, double or triple as needed.

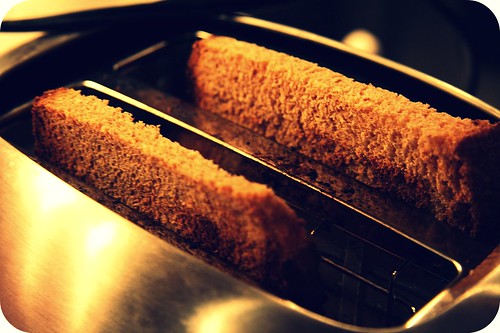
toasting bread

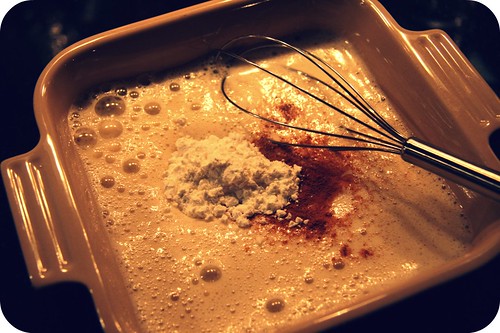
french toast batter

marinating

plated french toast

Out-of-Eggs French Toast
Adapted (quite a lot) from Vegan with a Vengeance
Yield: 2 servings

4 slices of bread (note: sourdough is usually vegan)
1/2 cup soy milk
1 banana
1 teaspoon vanilla
1/2 teaspoon cinnamon
1 tablespoon corn starch
2 tablespoons coarsely ground grain or legume (e.g. cornmeal, oats or brown rice pulsed a few times in your blender, chickpea flour, purchased baby cereal; I used a mixture of ground oats, rice and lentils that I have in my refrigerator always to make Super Baby Porridge for my daughter)

Margarine and maple syrup, for serving

Toast the bread slices.

In a blender, mix the soy milk, banana, vanilla, and cinnamon until no large banana chunks remain. (You could alternatively mash the banana by hand, just make sure it's really well-smashed and then well-combined with the soy milk, so it's the consistency of, well, egg I guess.) Pour into a pie plate or something comparable in size that will allow you soak the toast. Whisk in cornstarch until fully dissolved and then stir in your ground grain of choice. A few chunks are okay. Soak the bread slices in the soy milk mixture, one at at time, for about 1 to 2 minutes on each side.

Heat a nonstick skillet over medium heat. Spray with oil or melt some margarine in the pan (about a tablespoon). Cook each slice in the oiled skillet for about 2 minutes on each side, or until browned to your liking.

Serve immediately, with margarine and pure maple syrup.

Friday, October 22, 2010

Pumpkin and Sunflower Seed Burgers

I told you you'd see some repeat ingredients. What? I'm allergic to nuts. I like seeds. There just aren't that many kinds of seeds readily available. So I eat a lot of pumpkin seeds and sunflower seeds. And so does my family.

I used to think that pumpkin seeds and sunflower seeds were just something to add a nice crunch here and there. And indeed they do just that. But first the buttermilky seed purée I incorporated into the Dreamy Creamy Vegan Cauliflower Soup and now these burgers have convinced me that there is way more to seeds than crunch. They are actually quite flavorful and filling. Kind of earthy when raw, smoky when toasted. And you know what else is great about them? They're super cheap, especially when you buy them in bulk. You should add them to your list of staples.

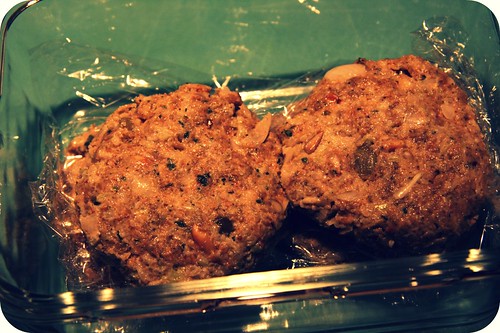
As I was making these burgers, I got nervous every step of the way. This is because I was making them before my epiphany about how flavorful seeds are. I feared they would end up bland or weird. But then they ended up coming together nicely, from a texture perspective, and then they baked evenly, which was affirming because I'd never baked a veggie burger before (I usually pan fry) and was delighted to find that baking doesn't result in a dry or crumbly burger. And then, finally, they were SO YUMMY. No individual ingredient took center stage. The flavors combined into something completely unique and, I guess, well, savory. That's the best word I can come up with. The earthiness of the seeds + the little spice kick from the cheese and hot sauce + the herby undertones from the cilantro and parsley = delectably savory. If I had to identify a favorite veggie burger, I am still partial to spicy black bean burgers (both generally and in my own kitchen), and I still encourage you to try out those inside-out chickpea burgers of my early blogging days if you haven't yet. But, frankly, I can't wait to make these again next week. They are so delicious and easy. They've sealed the deal: I will never eat a Gardenburger again.

Pumpkin and Sunflower Seed Burgers collage

uncooked seed burgers

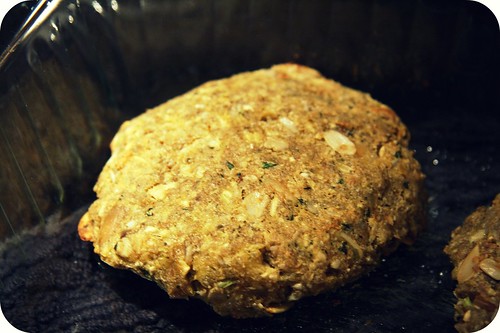
Where aesthetics are concerned, however, they leave something to be desired. Veggie burgers aren't photogenic. I tried.

baked seed burger

But look how happy I look eating mine!

me eating seed burger

With my bra showing! And my cute daughter being all cute and cute for the camera!

Dinner is so wonderful when you are eating super awesome healthy delicious seed burgers next to the goofiest toddler in the world!

(Sigh)

Oh, you wanted the recipe? Here you go.

Pumpkin and Sunflower Seed Burgers
Inspired by a nut burger recipe from Edible Twin Cities, Number 22, Fall 2010

3 ounces raw sunflower seeds
4 ounces raw pumpkin seeds (pepitas)
1 egg
1/4 cup chopped fresh cilantro
2 tablespoons chopped parsley (or more cilantro)
1 teaspoon dijon mustard (optional)
1 teaspoon Tapatio or other hot sauce
1 tablespoon lemon (or lime) juice
1/2 teaspoon smoked paprika
1/2 teaspoon salt
1 tablespoon cornstarch
2 slices day-old bread, torn into small pieces
1 cup shredded chipotle cheddar (if you can find it) or pepper jack cheese
1-2 shallots or green onions, chopped (or 1/4 cup regular onion)
2 celery ribs, chopped
1 tablespoon olive oil, plus more for greasing baking dish

Preheat oven to 375 degrees.

In a large skillet, toast seeds over medium heat, stirring frequently, until starting to brown, about 3-4 minutes. Transfer to a plate and allow to cool.

In a mixing bowl, using a fork, beat together egg, herbs, mustard, hot sauce, lemon juice, paprika, salt, and cornstarch. Add torn bread, stirring to moisten. Set aside for a few minutes to allow the bread to absorb some moisture and the seeds to cool completely.

Place the shallots or onions and celery in food processor. Pulse a few times until they are finely chopped. Add toasted, cooled seeds, bread mixture, cheese, and olive oil. Pulse several times, until the ingredients are well combined but the consistency still has a bit of grittiness to it. Divide mixture into 8 equal portions, about 4 inches in diameter and 1/2 an inch thick. Shape each portion into patty, place on a greased baking dish and bake for 15-18 minutes, until lightly brown and firm to the touch (mine were done right at 15 minutes).

Serve on whatever bread you prefer with whatever vegetables and/or condiments you prefer. (These are great on English muffins with guacamole!)

Thursday, October 21, 2010

Whole Wheat Soda Bread with Pumpkin Seeds and Dried Apricots

You are going see for yourself in the next few posts that I wasn't kidding about working my way through refrigerator, freezer, and pantry. You might also find yourself slightly amused by the kind of ingredients that accumulate in my kitchen. Recent trends you might notice: dried apricots, raw seeds, winter squash, potatoes, and frozen corn (our CSA farm has no problem growing potatoes or corn, even in weird growing years like this one). At first I was shy about this repeating of ingredients and contemplated staggering my recipes so that there wouldn't be five in a row featuring dried apricots. But then I thought those of you who might actually be making the food I rave about (and I know of at least two of you and I love you love you love you!) would appreciate some options to help you make use of those less familiar ingredients that you perhaps acquired only to try out some of the recipes posted here. What I'm trying to tell you is this: I'm not boring. I'm helpful.

Moreover, my primary talent in the kitchen is indeed my resourcefulness, and what better opportunity to highlight that gift than when I am in purge mode? (I will spare you certain details however, e.g., hot dogs, boxed risotto, and failures.)

Thanks for understanding!

On to the dried apricots!

I shared this bread with my dear girl Lisa the other day and she said, "is this one of the breads Michael made?" (Michael is my husband, the family breadmaker.) I was so excited to say, "No! I made it!" Because soda bread, by definition, doesn't have yeast, which scares me, so I can handle it. And I sort of love it. It's dense and a little chewy (but in a good way - chewy delicious) and it's rustic and hearty, excellent for soaking up soup or stew. (Which I imagine is what they do with it in Ireland?) It's also really great with a big slab of salted butter or a thick slice of hard, well-aged parmesan cheese. Irish soda bread: easy AND versatile! Also it freezes perfectly and thaws easily in the microwave or overnight on your counter.

Before we get to the recipe, I just want to make a note of one ingredient that is decidedly optional: fennel seed.

fennel seed

I used ground fennel seed in my version of this bread and I liked it a lot, especially when I ate it alongside a lemony-ginger butternut squash soup. But fennel has a distinct flavor of its own - it's more than an accent in this bread. If you like fennel and have it on hand, ground or whole, go to town. But if it's not a spice you are terribly fond of, skip it and you won't be missing out on much. It's by no means the best part of the bread. (The best part is the apricots.)

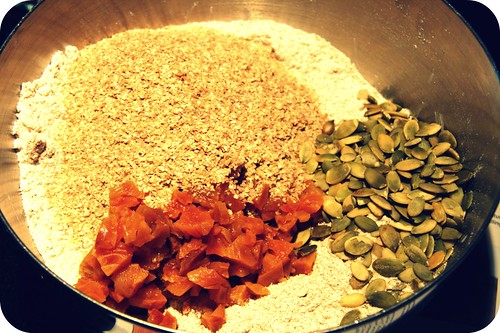
soda bread ingredients

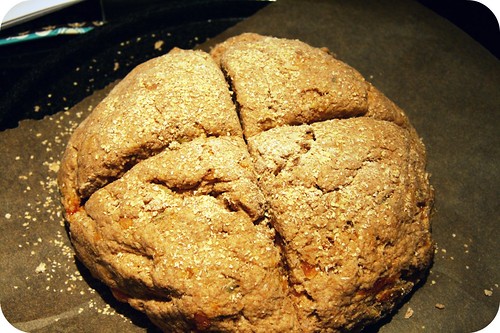
unbaked soda bread

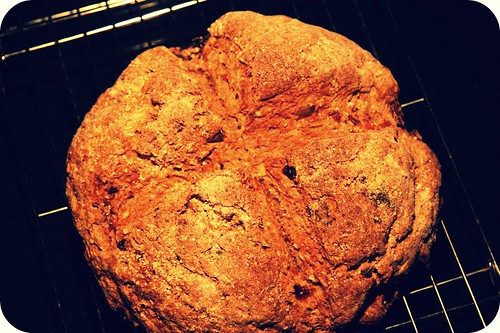
baked soda bread

Whole Wheat Soda Bread with Pumpkin Seeds and Dried Apricots
Adapted from Martha Stewart
Yield: 4 large servings, or 6-8 small

1 1/3 cup whole milk*
1/3 cup apple-cider vinegar*
3 cups whole wheat flour, plus more for surface
2 1/2 teaspoons salt
1 teaspoon baking powder
1 1/2 teaspoon baking soda
1 teaspoon ground fennel seed or 2 teaspoons whole fennel seeds (optional)
4 tablespoons cold unsalted butter, cut into small pieces
2/3 cup wheat or oat bran (unprocessed)**
1/3 cup wheat germ (untoasted)**
1/3 cup raw pumpkin seeds (a/k/a pepitas)**
1 cup coarsely chopped dried apricots, soaked in hot water for 15 minutes and drained

Preheat oven to 350 degrees. Line a baking sheet with parchment paper or a Silpat. Mix milk and vinegar in a measuring cup and let stand for about 5 minutes.

In a large bowl, whisk together, flour, salt, baking powder, baking soda, and fennel seed. Using a pastry cutter or your fingers, cut in butter until the mixture is sort of sandy, with some larger bits. Add bran, wheat germ, pumpkin seeds, and apricots and stir until everything is evenly incorporated.

Pour soured milk into the flour. Stir with a wooden spoon until dough is sticky. Turn the dough onto a lightly floured surface. Using floured hands, gently form the dough into a round, dome-shaped loaf, about 7 inches in diameter (mine was more like 10 inches). Transfer to baking sheet. Dust with wheat germ or bran or more flour. Score an X into the top with a sharp knife. Bake until loaf is golden brown, about an hour, rotating half-way through to allow for more even browning. Let cool on a wire rack.

* You could substitute 1 2/3 cup of buttermilk or plain yogurt thinned with a tablespoon of water.

** These items are found in the refrigerated bulk section of our grocery store. They might be hard to find at big stores, but I'm sure Whole Foods or something comparable would have them. You could use all bran (as the original recipe calls for) rather than part bran and part wheat germ.

Finally, this is, I suspect, an extremely forgiving recipe. Regular flour, any kind of whole wheat flour, or spelt flour would probably work fine. Raisins or currants are the norm in Irish soda breads and could replace the apricots. Any seed or nut could substitute for the pepitas, or they could be omitted entirely. Enjoy!

Tuesday, October 19, 2010

Corn Chowder with Salmon and Poblano Chilies

Hello! And I'm sorry for the spotty performance this month. I've been focused on working my way through our refrigerator, freezer, and pantry, rather than making exceptional, photogenic food lately. Plus I'm gaining weight faster than I'd like during this pregnancy, which tempers my enthusiasm for cooking and baking. (It unfortunately does not have the same effect on my enthusiasm for eating). I couldn't even rally to make something in honor of yesterday, which was National Chocolate Cupcake Day. (I kid you not. I heard it on MPR and they are truth-tellers. (Want more fun? Check this out.)) So I'm just a little behind in having post-worthy recipes for you. But some have trickled in, deliberately and even accidentally, and I have a couple I'm still working on for your reading (and viewing and making and eating) pleasure.

An example of an accidental post is today's soup. Don't get me wrong - when I throw a pound of salmon and whipping cream into a pot, I expect something good. But this concoction was way better than good - super delicious actually, shared with company, and worthy of second servings - and was initially galvanized by little more than my desire to use up all the corn I'd frozen and potatoes I'd stored from this summer's CSA bounty. When the internets led me to a southwesterny corn chowder that I could invision being a lovely home for the beautiful salmon filet I'd picked up at the farmer's market the weekend before... well, one thing led to another, and here we are.

This soup is wonderful.

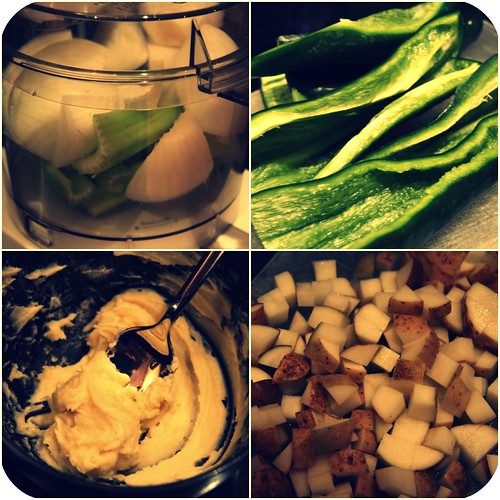
poblano corn chowder prep

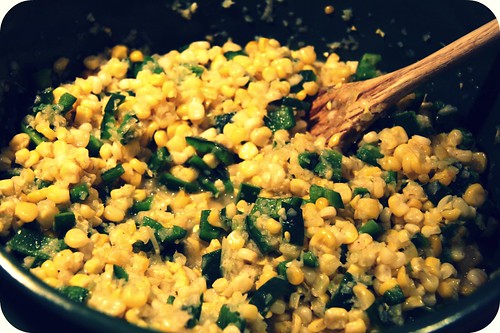
corn and poblanos

bowl of poblano corn soup

Also, it's getting to be quite the season for soup, isn't it?

Corn Chowder with Salmon and Poblano Chilies
Adapted from Bon Appétit, September 2002
Yield: 4 large servings

  • 4 tablespoons (1/2 stick) butter, room temperature, divided
  • 2 tablespoons flour

  • 1 medium onion, coarsely chopped
  • 3 celery stalks, coarsely chopped
  • 2 large poblano chilies, seeded, chopped
  • 5 cups corn, fresh or frozen and thawed a bit
    • 1 teaspoon sugar
    • 1/2 teaspoon cayenne pepper
  • 1 teaspoon ground coriander
  • 1 teaspoon ground cumin
  • 1 pound firm potatoes, scrubbed, rinsed, and cut into a 1/2" dice
  • 1 quart low-sodium chicken broth
  • 1 cup heavy whipping cream
  • 1 pound salmon filet, skin and large bones removed, cut into 1" pieces
  • 1/3 cup chopped cilantro, plus more for garnish

Using a fork, mix 2 tablespoons butter and flour in small bowl to blend; set aside.


Mince onion and celery by hand or in food processor. Melt 2 tablespoons butter in large soup pot over medium-high heat. Add onion-celery mixture and chilies; sauté until soft, about 6 minutes. Add corn, coriander, cumin, sugar and cayenne. Stir for 1-2 minutes, until fragrant. Add potatoes, chicken broth and cream, bring to boil. Reduce heat. Whisk in butter-flour mixture and simmer 15 minutes, or until potatoes are cooked through and flavors have blended. (Now would be decent time to taste test.) Add salmon and simmer until just cooked through, about 3 minutes longer. Stir in cilantro and season with salt and pepper. Serve hot, with a sprinkle of cilantro and maybe some tortilla chips and a big smile, if that's all you have on hand.

Monday, October 11, 2010

Apricot-White Chocolate* Scones

[*Technically, these are Apricot-Coconut White Chocolate Scones, but that is a long name and also I know some people don't dig coconut as much as I do, so I thought I'd specify in the recipe what specific white chocolate I used (the kind with coconut in it) and I'd go on and on about how delightful it was, but plain old white chocolate would be a perfectly acceptable ingredient as well, as made clear by title of post. I'm so accommodating!]

Do you remember when I mentioned, a few weeks ago, as an aside in a post that had nothing to do with America's Test Kitchen (hereinafter "ATK"), that each recipe I've tried in the ATK cookbook - specifically The Complete ATK TV Show Cookbook 2001-2010 - produced the best version I've ever tasted of whatever the recipe was for? Well, I wasn't kidding. Admittedly, I've only made a teeny tiny fraction of the possibilities that the ATK cookbook provides (because the book is huge), but, so far, without fail, each recipe I have attempted has resulted in something incredible. My famous best-ever nachos are adapted from the ATK cookbook. I've also made super tasty black bean soup, butternut squash risotto, "smashed" potatoes, and - seriously - even their instructions for perfect quesadillas are truly perfect!

While I was on maternity leave last year my dear former neighbors lent me their Cooks Illustrated magazines, and then my Aunt Tammey gifted me her older volumes, and I became obsessed. The experimentation that these folks conduct on a regular basis is just unbelievable. They are so dedicated. I wish I could work with them or at least be a taste-tester. They are scientific, culinary geniuses. Infusing chicken broth with butternut squash seeds in order to make a more flavorful butternut squash risotto without throwing in too much butternut squash? Brilliant. Cooking down a portion of the blueberries into a syrupy jam ribbon in order to make more flavorful blueberry muffins without dumping more blueberries (which will inevitably sink to the bottom, duh) into the batter? But of course!

I consider everything they say 150% accurate and reliable and I never veer from their instructions, even if I do maybe mess with ingredient/flavor profiles regularly since that's my M.O.

(Don't even get me started on their product reviews, or the fact that I got a 12" nonstick skillet based on their recommendation, or that I ditched using Pacific Organic Chicken Broth because their tasters said it was reminiscent of mushrooms.)

So, while the romance started with the magazines about a year ago, and things got serious when my friend Amber let me borrow her older version of the ATK cookbook for several months, I officially fell head over heels when Amber got me the current issue of the ATK cookbook earlier this past summer. It would not be an exaggeration to say that this cookbook has changed my life. I love it. We're going to get married. You're all invited.

But enough about my love life. Let's talk about scones.

Scones are, theoretically, so wonderful. Soft on the inside, shiny on the outside, just-enough-crumb, not-too-sweet, a little British, and super versatile. These are all the things I think of when I think of scones. And, because my dreamy thoughts get the best of me whenever there is a case of pastries in front of me, I frequently get suckered into buying a coffee-shop scone when, time and time again, they are hard, dry, stale, and sickeningly sweet. All 650 calories of them are more worthy of the waste bin than my waistline. (That was my lame attempt at a pun. A+ for effort?) But I never learn. Especially when they have white chocolate in them. And they so often do, right?

(Every time I see a white chocolate-apricot or white chocolate-raspberry (or blackberry or strawberry) scone, I want to buy it and eat it immediately. I love white chocolate. In kind of a weird way, given what a weird food product it is. I think it comes down to the fact that it's mostly sugar. I LOVE SUGAR. )

What could be better in a scone than white chocolate? COCONUT WHITE CHOCOLATE. Actually I ended up with the coconut white chocolate bar pictured below totally on accident. I just didn't read the label properly at the grocery store. But I'm grateful for my scatterbrainedness in this instance because it was super super super super good. That's four supers. That's GOOD.

scone collage

This post is unbelievably long and rambly. I'm sure you've noticed that and I just want you to know that I've noticed too and I'm slightly mortified and it's because I've been writing this post on and off for like a week and that's not the writing approach that works for me, especially when I'm as enthusiastic about my topic as I am about these scones, so it's disjointed and I've lost momentum and really all I wanted to say the whole time was this:

THESE ARE THE BEST SCONES EVER.
BECAUSE THEY ARE FROM THE BEST COOKBOOK EVER.
AND THEY HAVE WHITE CHOCOLATE IN THEM.

P.S. YOU SHOULD BUY THE ATK COOKBOOK.

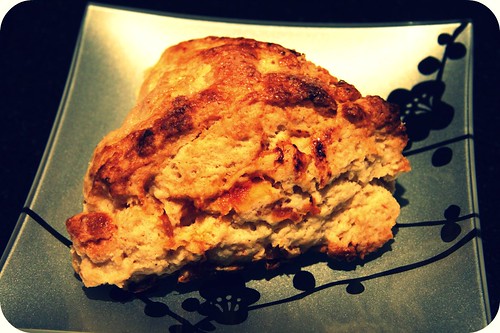
plated scone

They taste like what you want the scones to taste like at your local chain coffee shop.

plate of scones

They smell good too. Even my tiny daughter couldn't wait for them to be done.

sadie eyeing scones

You should really really really make them. And then invite me over for tea.

Apricot-White Chocolate Scones
Yield: 8 perfect scones

2 cups all-purpose flour
3 tablespoons sugar
1 tablespoon baking powder
1/2 teaspoon salt
5 tablespoons unsalted butter, chilled and cut into 1/4" cubes
1/3 cup coarsely chopped dried apricots, soaked in hot water for 10-15 min and drained well
1/3 cup white chocolate chips or chopped white chocolate or - better yet - chopped coconut white chocolate
1 cup heavy whipping cream

Preheat oven to 425 degrees.

Place flour, sugar, baking powder, and salt in a food processor and pulse a few times to combine. Scatter the cubed butter evenly over the top and pulse until the mixture resembles coarse cornmeal with a few lumps, about 8-12 pulses. Transfer the mixture to a large bowl and stir in the dried apricots and white chocolate. Stir in the heavy whipping cream with spatula until the tacky dough forms. Transfer the dough and any leftover dry bits onto your counter or a cutting board and knead the dough by hand just until it comes together into a sticky ball (see pictures above - mine took about 5 good squeezes and flips). Cut the dough into eight wedges and place them on a baking sheet. Drizzle or brush some cream or milk on top of each scone. Bake on middle rack for 12-15 minutes, or until scones are lightly browned. Cool on a wire rack for at least 10 minutes.

(These freeze beautifully. And I didn't do anything fancier than thawing them in the microwave.)

------------
To close, I have a question for you friends and relatives and occasional accidental readers: how'd you like the 10-days of CSA thing? The format worked well for me because it kept me focused and productive and committed. I'm thinking of doing it again. Here are my ideas: 10 days of Soup... or Pancakes... or Cookies... or Eggs... I had some other ideas but they are escaping me right now. If you like the format and want to see it again, and/or if you have ideas, please let me know! Thanks, man!

Tuesday, October 5, 2010

Grilled Cheese Fit for a King Pregnant Woman

Hi again and happy October! We are having a beautiful October in Minneapolis, with cool nights and sunny, warm-ish days. The leaves are all falling off the trees and I'm more appreciative of seasons this year than ever before, likely because we've actually had seasons this year in Minneapolis, whereas last year we were robbed of both fall and spring.

My family is in between travels right now, enjoying almost four whole weeks at home until we head to New York and then California. When we're home for this amount of time I do a better job of having a well-stocked, organized kitchen, and we eat more meals at home.

Sometimes I even make myself a really giant, restaurant-quality lunch during these periods of domesticity. Lately, I feel quite justified in doing just that, as I am with child and was also a nursing mother until about four days ago, and mama needs her calories.

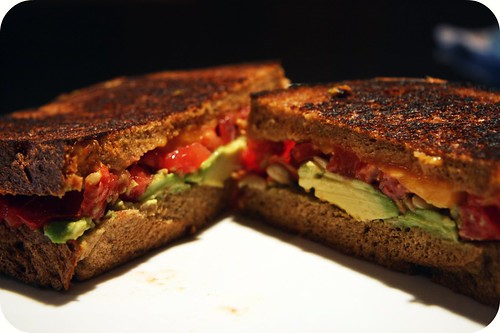
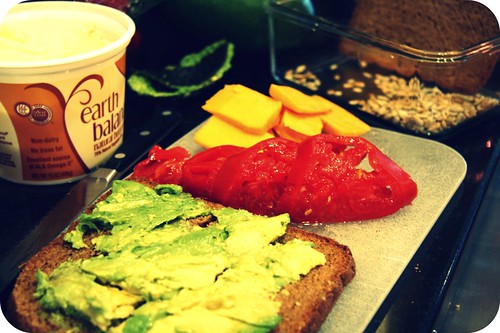
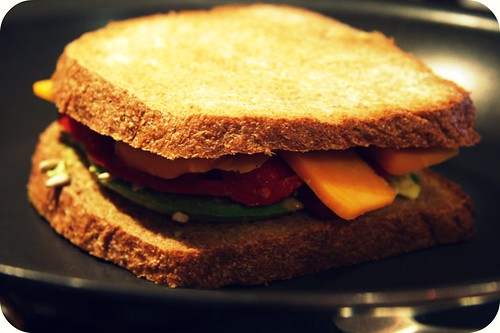
fancy grilled cheese

This sandwich is phenomenal.

phe·nom·e·nal
adj.
1. Of, relating to, or constituting phenomena or a phenomenon.
2. Extraordinary; outstanding: a phenomenal feat of memory.
3. Philosophy Known or derived through the senses rather than through the mind.

Oh you heard me.

The only thing that could make it even more extraordinary, outstanding, or known or derived through the senses rather than through the mind is the addition of crispy bacon. But my fetus probably doesn't need nitrates.

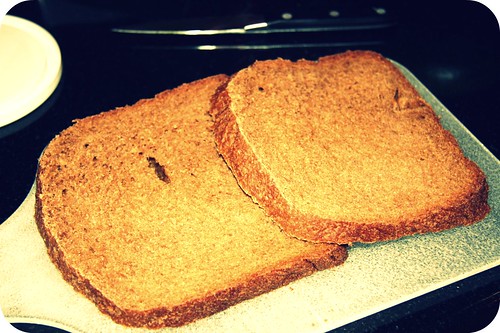
mc's bread

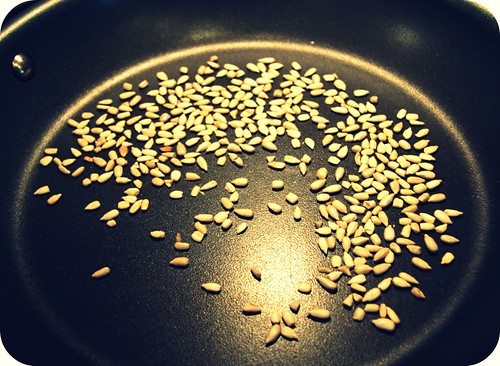
sunflower seeds toasting

grilled cheese fixins

stacked

finished product


Grilled Cheese Fit for a King Pregnant Woman
From Yours Truly, crafted during an intense moment of personal need

2 large slices delicious freshly baked sandwich bread*
Earth Balance buttery margarine or real butter
handful of raw sunflower seeds
1/2 ripe avocado
1 medium super ripe, bright red tomato, sliced and seeded
1 to 2 ounces cheese**, sliced about 1/4" thick
seasoned salt, or salt and pepper

In a non-stick skillet, toast the sunflower seeds for about 2-3 minutes over medium heat, until starting to brown.

Meanwhile, generously coat one side of each slice of bread with butter or margarine. Once sunflower seeds have browned a bit and are fragrant, turn the stove off and remove the seeds from the pan so they don't continue to cook.

On one slice of bread, squeeze out the flesh of your half avocado and spread it as evenly (but thickly) as possible on the side that is not buttered. Sprinkle the toasted sunflower seeds on top and then the tomato slices. Salt and pepper to taste. Finally, gently add the cheese slices, careful to avoid overhang, and top with the second slice of bread, buttered side out.

Turn on the stove to medium and carefully place the sandwich in the still-warm skillet. Toast for about 3 minutes or until down-side is lightly browned, then flip (I use two spatulas to do this). Toast for 3 more minutes or so - if cheese is not as melty as you'd like, place a lid on the skillet for a couple minutes (I always do that). Cut in half and enjoy!

Note that this sandwich probably has a thousand calories, each one of them as delicious as the next. The butter/margarine is not the issue - I used less than a tablespoon and it was plenty. It's the cheese and avocado, which you could of course use less of. Or you could split it with someone, if you are not a pregnant woman.

---------------------

*My husband made a really great loaf of sandwich bread in our long-term-borrowed bread machine, and that's what I used for my sandwich and appears in the above pictures. It's v. molassesy and hearty. I've pretty much eaten the whole loaf on my own. Here are the ingredients for a 2 lb loaf in case you want to make it in your own bread machine or with your hands. (But I'm not a bread maker, so I don't have by-hand directions for you.)

1 1/2 cups water
4 cups whole wheat flour
1/2 cup gluten
1/4 cup molasses (we used blackstrap)
2 teaspoons salt
2 tablespoons butter
2 1/2 teaspoons active dry yeast

**Pick one that would be good for melting and note that the more flavorful the cheese is, the more it will overpower the other ingredients. I used a mild colby jack.