And Edith Too!

Friday, May 27, 2011

Sometimes we eat healthy: Miso Soup for 2.5

I'm toying with the idea of regularly titling my posts with something pithy or apropos rather than just stating what food I'll be talking about. That would suit me, right? And I don't think it would affect searchability at all.

Hey, Edith, you know what would affect searchability? In a good way? A search option. Or a freaking recipe index. Can you get on that please?

Yes. I can. I will. I promise.

Someday.

(My mom and sister will be visiting in the next two weeks, so maybe I'll take advantage of their presence (i.e. free, convenient, in-home child care) and go to a coffee shop for two hours (that's as long as I can go between infant feedings) and get it done then. It's not a daunting task. It's just not been something I can prioritize lately and it does sound a little tedious, despite how useful it will be for me and all the people who end up visiting this site (mostly for a mayo-free tartar sauce recipe, based on my Google analytics info).)

But anyway. This post is meant to demonstrate that it's not all cookies and sweet rolls here. Our dinners lately have been uber-healthy and fresh, because we need that to counteract the cookies and sweet rolls, and because we're trying to get ready for the Minnesota CSA season. We're easing into it by getting a lot of herbs and green vegetables from the farmer's market every Saturday. So hopefully by the time our first share arrives we will be so practiced in the art of veggie-centric-meal-making that the amount of leafy greens and young alliums we find in our box won't overwhelm us in the least.

miso soup close-up

My go-to vehicles for using up or pumping into my family vegetables are soups, salads and smoothies. Since it's been chillier here than we'd like for it to be in, you know, late May, we ended up eating soup several times this week. This particular miso soup was a favorite because it is lovely, subtly salty (everyone loves a subtly salty soup, right?), and tastes like it's boosting our immune systems a bit. Is it really? I really don't know, but my kids and I have been swapping the sniffles for like five months now, so I'll try anything to get some wellness into this home, scientifically backed or not.

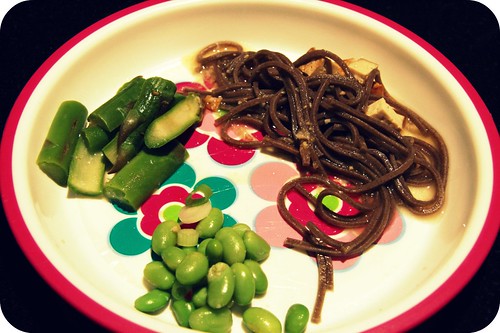
deconstructed miso soup

My toddler's deconstructed portion is what makes the 0.5, by the way. Cute, eh?

miso soup for 2.5 collage

I used soba noodles, sweet white miso, spinach, and baked teriyaki-flavored tofu in this soup. Udon or linguine, any kind of miso, and watercress or bok choy could be substituted for what I used and you could use extra firm plain tofu in place of the baked kind, or you could omit it entirely. (Also, my husband hates them, but if I were eating this myself I would have thrown in a handful of sliced mushrooms with the asparagus and tofu.) My point in this paragraph being this is obviously an anything-goes kind of soup. Knock yourself out. And kick that cold.

Miso Soup for 2.5
Adapted from 101 Cookbooks
Yield: 2-3 servings

4 cups water
1/4 cup miso paste
About 3 ounces uncooked soba noodles
1/3 pound asparagus, rinsed and cut into 1" pieces
4 ounces baked tofu, cut into 1/2" cubes (optional)
One bunch (or 2 large handfuls) spinach, torn or coarsely chopped
1 cup frozen or fresh edamame (if frozen, start to thaw before bringing water to boil)
2 scallions (or one stalk of green garlic, if you can find it at the farmer's market), thinly sliced
1/2 teaspoon red pepper flakes (or more, to taste)
1 tablespoon soy sauce (or more, to taste)

Place water in 2-quart saucepan and stir in miso. Bring to boil, add noodles, and cook according to package instructions. When there are two minutes left for the noodles to cook, add the asparagus and tofu, so that the asparagus is al dente and tofu is just warmed through.

While water is boiling and noodles are cooking, divide the spinach into two soup bowls. Top each bowl of spinach with half the edamame, half the scallions or green garlic, and 1/4 teaspoon or more of red pepper flakes. When the noodles are finished cooking, ladle equal portions of miso broth, noodles, asparagus and tofu on top of the fresh vegetables in the soup bowls. Drizzle 1/2 tablespoon of soy sauce on top. Serve piping hot and clear those sinuses.

Wednesday, May 25, 2011

I Love Prunes, Part 2: Whole Wheat Butter Cookies with Prune-Poppy Seed Filling

So this post is first and foremost intended to give you an easy, tasty way to use up the rest of the prune-poppy seed filling that you guys all made yesterday. (Right? That's how inspiring I am?)

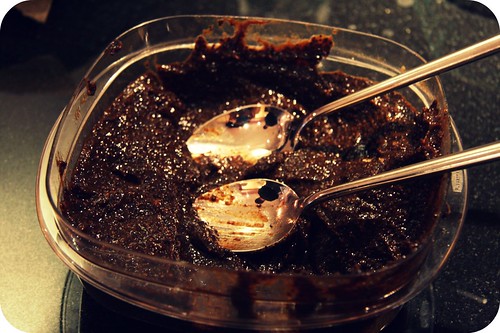
prune poppyseed filling

But this post serves a separate function as well. For you see...

(drum roll)

... herein lies perhaps the best butter cookie dough recipe you'll ever come across (at least of the make-in-five-minutes variety).

Bold of me to say this? Yes.

Inaccurate? Try it and see.

prune-poppyseed sandwich cookie collage

I used it to make sandwich cutaway cookies (pretty, eh?). They were delicious - the earthy, complex sweetness of the poppy seed filling paired perfectly with the nutty whole grain flour I used. (Any not-too-fussy whole grain flour would work, e.g. kamut, spelt, barley, rye; I'd use this recipe (one of my all-time faves) if you're trying to use up a bag of buckwheat flour, however.) But what with the generous doses of butter and vanilla, this cookie dough recipe lends itself to much more than these cutaways (pretty though they may be). You could sandwich them with just about any jam or jelly you have on hand; you could throw some fruit compote on the dough to make some free-form, rustic tarts; you could form little balls (hee-hee), roll them in cinnamon-sugar and call them the best, butteriest snickerdoodles you've ever tasted; you could form big balls (ha-ha) and make thumbprint cookies with some caramel or maple syrup and a sprinkling of sea salt; or you could just make the dough into simple little shortbread rounds (which I did with the leftovers).

trio of cookies

I'm just the scribe. You run with it. I believe in you.

Whole Wheat Butter Cookies with Prune-Poppy Seed Filling
Adapted from Edible Twin Cities, Winter 2010-2011
Yield: about 2 dozen cookies, depending on what size cookie cutters you use

(Please see notes at bottom of recipe.)

1 1/2 sticks butter, softened (that's 6 ounces or 3/4 cup, rookies)
3/4 cup sugar
1 egg
1 tablespoon vanilla extract
2 cups whole wheat flour, plus more for rolling out dough
3/4 teaspoon baking powder
1/2 teaspoon salt
1/4-1/2 cup prune-poppy seed filling (recipe below) or other jam or jelly
1/4 cup powdered sugar, for dusting

Special equipment: two cookie cutters, one standard sized (2-3 inches) and a smaller one to make window (about 1 inch)

In large mixing bowl, cream butter with electric mixer. Add sugar; beat on high until pale and fluffy, about 2 minutes. Add the egg and vanilla and beat until incorporated. Sift flour, baking powder, and salt into mixing bowl, cover top with a towel to avoid a big flour cloud, beat at low speed until just mixed. Divide dough in half and form each half into a ball and then a 6" disk. Wrap with waxed paper and refrigerate until firm (about an hour).

When you're ready to roll and bake the cookies, preheat oven to 375 degrees. Remove one disk from the refrigerator at a time. On a generously floured surface, roll the first disk to 1/8" thickness. Working quickly but carefully, cut as much of the dough as possible with a large cookie cutter, place half of the cut cookies on a parchment-lined baking sheet at least 2" apart, cut windows in the remaining half of the cookies using your small cookie cutter, and place the windowed cookies on the baking sheet (or use two baking sheets, depending on how many cookies you are able to get from this first rolling, but be sure to bake both sheets simultaneously (see notes)). Bake for about 10 minutes, until the edges are beginning to color slightly, rotating pans (switch top and bottom, if using two sheets, and spin 180 degrees whether you're using one or two) after 5 minutes. Cool on pans for 5 minutes and then transfer to wire racks to cool.

As soon as the cookies are in the oven, roll the scraps together into a ball, flatten into a disk, wrap and refrigerate for about 15 minutes so you can roll out another batch. (See notes.) Repeat this whole process with remaining dough, always having the same number of cookies without windows and cookies with windows.

Spread about 1-2 teaspoons of prune-poppy seed filling, jam, or jelly on each whole cookie, using a lighter coating around the edge and having a slight mound in the center. Using a mesh strainer, generously dust the windowed cookies with powdered sugar before placing each windowed cookie on one of the whole cookies.

Notes! Or rather, Learn From My Mistakes!
1. Don't allow the dough to soften at room temp to make rolling it easier - to get tidily shaped cut-out cookies you will need the dough to be as firm as possible. Put your back into it!

2. Don't put the cookies closer together on the baking sheets than two inches apart. They expand and rise more than you'd expect.

3. Don't use one ball of dough to make the whole cookies and another ball to make the windowed cookies. You need to make both sandwich components from the same ball because even the minutest variations in kneading and softening of the dough (or oven temp) will affect how much the dough rises in the oven. If you make them from different parts of the dough, you will end up with differently-sized tops and bottoms (see bottom right picture in collage, compared to final picture of trio of cookies, taken once I'd learned my lesson).

4. So long as you mind note #3, you can salvage scraps, form a ball, refrigerate, and re-roll several times. The original recipe said to do this only once, but I did it three times and it worked just fine, with no detectable differences in texture or crumb.

5. These cookies are best fresh because they will be crunchy and crunchy is nice in a sandwich cookie. If you store them in an airtight container, they will still taste good for a couple of days but the filling will cause them to soften significantly. If you want them to stay crunchy, store in an airtight container without making sandwiches; assemble just before serving.
---------------------------------------------------

Prune-Poppy Seed Filling
From yours truly
Yield: about 3 cups (way more than you need - you'd better make these too)

1/2 pound prunes
1/2 cup brown sugar
1 cup milk
1 cup poppy seeds
1 tablespoon orange peel
1/2 tablespoon vanilla
1/2 tablespoon Grand Marnier (or Cointreau) (optional)
1/4-1/2 teaspoon lemon or orange extract (optional)

Place the prunes in a 2-quart saucepan and cover with water. Add brown sugar, milk, poppy seeds, and orange peel. Bring mixture to boil, then lower heat, cover and simmer for 30 minutes. Remove from heat, allow the mixture to cool, then blend the mixture (ideally using an immersion blender) or mash well with a potato masher, breaking up the prunes so that they form a paste. Stir in vanilla and Grand Marnier and lemon or orange extract (if using).

Monday, May 23, 2011

I Love Prunes, Part 1: Prune-Poppy Seed Rolls

Well, the title got the awkward part out of the way, right? But seriously. I love prunes! They are delicious. Like raisins only, you know, way better because they are made from plums. (Grapes should just stick to what they do best: fermenting.) I put prunes in smoothies, I've successfully thrown a handful into some beef stew (like so), and I've posted about a semi-healthy prune cake before on this blog. I'm v. drawn to prunes. What else can I say?

Maybe that I'm also drawn to poppy seeds? Or to seeds generally? I think that has to do with the nut allergy. Seeds are kind of like nuts but not, so I feel like I constantly have to experiment with them in order to feel like I'm not really missing out on much despite being deprived of essentially all tree nuts.

So. It follows quite predictably that one of my absolute favorite treats offered at Moose & Sadie's, one of the two neighborhood coffee shops I frequent, is a poppy seed-prune roll, comprised of a gooey-housemade-poppy seed filling, rolled inside a semi-sweet yeasted dough, and topped with a sugary, vanilla glaze. It is spectacular.

When I recently saw on Smitten Kitchen a poppy seed cookie recipe, I was intrigued and inspired by the idea of a homemade poppy seed filling. Especially one that could include prunes. Rolled inside a sweet dough and topped with a glaze. An orangey glaze.

prune poppyseed rolls in progress

One thing led to another. I basically messed around with a bunch of prunes and poppy seeds and every flavoring I could think of that sounded good and happened to be in my kitchen. Boiled it all for a while. Threw together my favorite yeast-free sweet roll dough, rolled the filling up, sliced the log into some rolls, and baked them for 15 minutes.

poppyseed prune roll close up

And now we're here. Frankly, I couldn't be happier.*

Prune Poppy Seed Rolls
From yours truly
Yield: 12 rolls

For filling
1/2 pound prunes
1/2 cup brown sugar
1 cup milk
1 cup poppy seeds
1 tablespoon orange peel
1/2 tablespoon vanilla
1/2 tablespoon Grand Marnier (or Cointreau) (optional)
1/4-1/2 teaspoon lemon or orange extract (optional)

For dough
2 cups whole wheat pastry flour
1 tablespoon baking powder
1/2 teaspoon salt
1/4 teaspoon baking soda
3/4 cup cottage cheese
1/3 cup plain yogurt
1/4 cup sugar
4 tablespoons melted butter
2 teaspoons vanilla

For icing
1/3 cup fresh-squeezed orange juice
2 cups powdered sugar
1/4 cup butter, softened

Preheat oven to 400 and butter a 10″ springform pan.

Place the prunes in a 2-quart saucepan and cover with water. Add brown sugar, milk, poppy seeds, and orange peel. Bring mixture to boil, then lower heat, cover and simmer for 30 minutes. Remove from heat, allow the mixture to cool, then blend the mixture (ideally using an immersion blender). Stir in vanilla, and Grand Marnier and lemon or orange extract (if using). (Note: This makes a lot of filling. WAY more than you'll need for the rolls. Like three times as much, maybe. So feel free to try to cut the recipe in half if you want, or stay tuned for part 2, or put the filling on toast with cream cheese or ricotta or on crackers or on ginger cookies.)

While the prune-poppy seed mixture is cooling, make the dough. In a bowl, sift together flour, baking powder, salt and baking soda, and set aside. In a small food processor, mix cottage cheese, yogurt, sugar, melted butter, and vanilla, pulsing for about 10 seconds until just mixed and cottage cheese is pureed. Add flour mixture to cottage cheese mixture, pulsing in short bursts until dough is just starting to form a ball. (You can do this by hand too. Either blend the first slew of ingredients to make it a smooth wet blend, or just deal with the cottage cheese curds (which won't harm anything but will result in a slightly less-smooth dough) and stir the wet ingredients together and then add the dry blend.)

Turn dough out onto a well-floured surface (this is important - WELL. FLOURED.), kneading a couple times with floured hands until smooth enough to form a large ball. Flatten a bit with your hand and then, using a floured rolling pin and dusting your work surface with a bit more flour, roll dough out into a 12″x15″ rectangle. Spoon about two cups of the prune-poppy seed mixture onto the dough and spread evenly, leaving a 1" border of dough around the filling. Carefully, slowly, roll the dough up lengthwise, pinching ends. (If you'd like you can roll the log in plastic wrap and chill the dough for up to a couple days. Then, slice it whenever you're ready to bake it.) Using your sharpest knife, cut dough into twelve rounds. (If the dough is not chilled, they will squish a little bit, but don’t worry about it.)

Arrange the rolls in the springform pan and bake for about 15-20 minutes, until an inserted toothpick comes out with just a few moist crumbs.

While the rolls are baking, combine all the icing ingredients and beat together using an electric mixer, until fluffy-ish. Once rolls are done, allow to cool for about five minutes, then drizzle or spoon icing over buns, let cool for about five more minutes, then unmold the springform.

These freeze exceedingly well. Just throw them in the freezer once they've cooled completely. Microwave them for a minute or two, or thaw them and then toast them in the oven at 400 degrees for 5-10 minutes. If you've already iced them, the glaze will kind of soak in but that doesn't harm them (just makes them a bit sweeter, oh damn).

*Okay - I could be happier. I threw this icing together v. impulsively and resourcefully, with little thought about ratio or perfection. I think this cream-based icing or this brown sugar icing, with a little orange zest added, might be better.

Monday, May 16, 2011

Burgers de Paris

Hey, remember when I had a food blog? And then I had a baby? And I was like, dude! I can still blog -- this is CAKE. (Ha. Get it?) Well, incidentally, I was able to care for crazy toddler + lovely infant AND blog only while I had my 24-7 supportive network here, i.e. my mom and husband. Mom left almost a month ago now. (Crazy. Seems like both yesterday and an eternity ago. The good news is that she'll be back in two weeks. Yay!) MC went back to work part-time two weeks ago and full-time last week.

Plus I have a cold manifesting itself as a sore throat.

Plus I got my first super mean-spirited offensive spam comments last week which totally made me want to shut the whole site down.

Plus I have arthritis or carpal tunnel syndrome or at the v. least "weak wrists" that act up every now and again, getting sore and then tingly and then numb. (Seriously that was once my diagnosis. "Weak wrists." I've never gone back to that doctor.) Recently they've been acting up worse than ever, likely because my baby is heavy but likes to be held all the time, and because, while my computer is quite sleek, ergonomic it is not. (We have added "get an ergonomic keyboard and mouse" to our family's weekend to-do list.)

So the food blogging has suffered.

BUT.

The cooking has not! I've made the burgers featured herein twice, maple-sweetened homemade grape nuts (but I need to perfect my method for those before I promote them here), a savory bread pudding, Indian-spiced sweet potato muffins, lemon-herb shirred eggs, slow cooker lime-dill chicken, whole wheat butter cookies with prune-poppyseed filling (SO GOOD), and this and this and these. So I have lots to write about, just not the time, energy and focus.

Given my new limits, I can't promise to blog more regularly than I have been despite having the v. best intentions to do so. But I can make sure that the posts I do manage to complete showcase only the v. best of what we eat around here.

Which brings us to today's burgers. Burgers de Paris! And you have to say "Paris" like the Parisiennes. (Try your best anyway.)

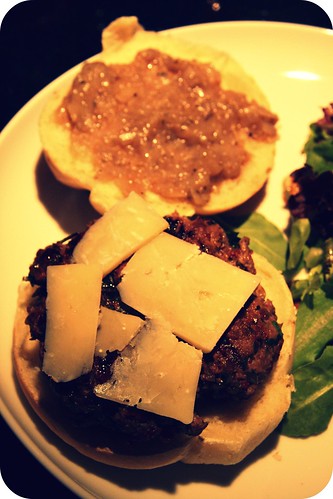
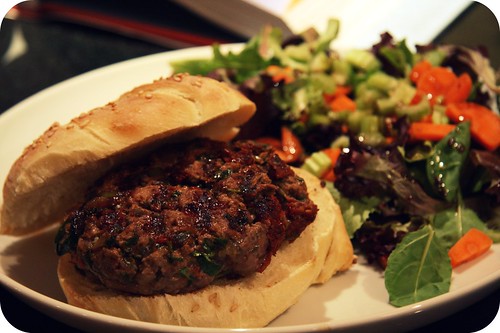
burger unveiled

I'm just going to go ahead and embrace my love of superlatives (and all-caps) (and repetition as a means of emphasis) and say that this is the best burger ever. EVER. EVER.

There's a salty-sweet thing going on what with the inclusion of sun-dried tomatoes, pickles, and capers. They're unabashedly herby. They're easy, don't require a grill, and taste great on homemade Kaiser rolls if you happen to be as lucky as yours truly.

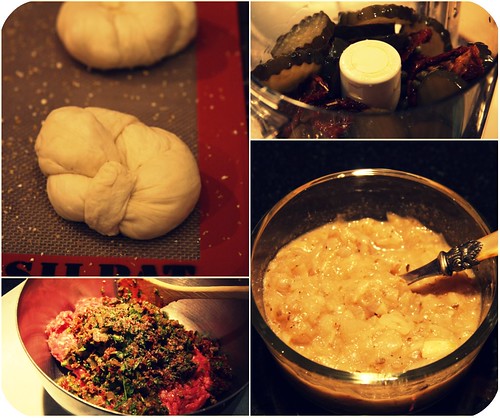
everything from scratch
plain burger

We made a shallot jam-version of a red onion jam recipe accompanying the recipe that inspired these burgers - that's what's featured in the bottom right picture in the collage above and in this post's first picture. I'm not including the recipe for the jam because I didn't think it added much. A lemon aioli or roasted garlic puree would be a better accompaniment, although we thoroughly enjoyed the burgers unadorned.

Burgers de Paris
Yield: 4 quarter-pounders

1 pound lean ground beef, at room temperature
1/4 cup oil-packed sun-dried tomatoes, drained
1/4 cup marinated artichoke hearts, drained (optional, but nice)
1/4-1/2 cup crunchy sliced dill pickles, drained and rinsed
2 tablespoons capers, drained
Small handful fresh tarragon leaves
Large handful fresh parsley or chives (I prefer the latter but made them with both and both were more than acceptable)
Salt and pepper, to taste

Grapeseed oil or butter for pan

To serve: sliced dill pickles, paper-thin slices of parmesan cheese, Kaiser rolls or English muffins

Using a mini food processor and the pulse button, or by hand, using a chef's knife, chop all the burger ingredients except the beef until finely minced and well-combined. Put the beef in a large bowl and add the tomato mixture. Mix everything with your hands and form the mixtures into 4 equally-sized patties, just less than an inch thick.

On the stove using medium-high heat, place 1-2 tablespoons grapeseed oil or butter in a heavy-bottomed skillet. Once the skillet is super hot, add the burgers. Don't press down on the burgers as that will force some of the fat (which equals flavor!) out of them. Cook for 3 minutes on each side for medium-rare. Transfer to a platter and top them with parmesan immediately, while they're still warm. Once the cheese has melted a bit, place the burgers on Kaiser rolls or English muffins, add the sliced pickles, and enjoy, preferably with someone who loves you fiercely, who doesn't mind watching burger juice dribble down your chin.