I know. This is totally a mega post. But I have so much to tell you!
First things first: some mega news! After teaching nearly two hundred classes over the last three and a half years... having now shared my love of cooking local foods with over 1,500 wonderful guests at Local D'Lish... and with generous help, advice, and encouragement from beloved friends and family members... (wait for it)... I am finally spreading my (chicken) wings. As of last week, I am teaching cooking classes from my home. Hooray! Life is short and I think I've finally got my groove on, so I'm striking while the oven's hot (and this time, it's a real oven!) - embracing this time of transition in my life to leverage contacts and build community through food in the place where I can be most welcoming - my v. own little kitchen.
Last Wednesday, eight women (and the cutest infant ever) gathered around my kitchen island to experience a more intimate version of my popular Mambo Italiano class. It was one of the most fun evenings I've ever spent teaching (could've been the prosecco...), and I learned a ton about teaching in a new space in record time. Teaching in my own kitchen is going to have its challenges - I don't have staff (yet?) and I don't have the kitchen theater/presentation-style set-up to which I've grown accustomed at Local D'Lish. I had to be someone different on Wednesday than the teacher I've become in a store setting. Which is weird, because I feel like I'm just myself in the store, but I guess we are many selves and some of those selves make sense onstage but not so much four feet away from your guests. My mom filmed a few minutes of me in action and watching her footage has been valuable (and humbling). On the plus side, I think I seem pretty natural and informed, despite being quite nervous, and my ass doesn't look nearly as bad as I'd feared it would when I'm facing stove versus guests. On the minus side, I totally don't smile enough! I'm hoping that was just aforementioned nerves. At any rate, it will be on my mind henceforth. I intend to only get better. Specifics, including pricing, dates, menus, and what you can expect to learn in my kitchen, will be on my website by the end of the month. I plan to offer two public classes in March, details forthcoming, so please come and spread the word! Private, custom events are also in the works. Email me to get the ball rolling.
To clarify: I will still be teaching at Local D'Lish! It's the best job I've ever had and we definitely aren't ready to part ways. Through March I'll be teaching public classes at the store on Thursdays and Sundays. Beginning in April, I'm tapering back a little bit and will be teaching about once a week.
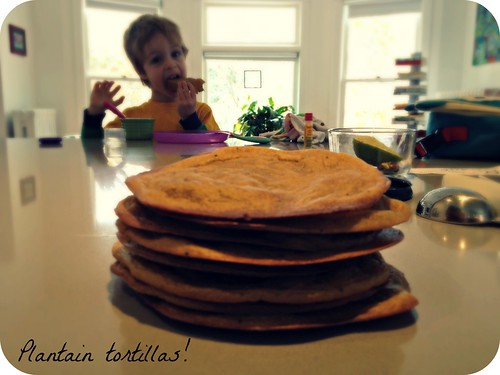
And now for today's recipe: Plantain Tortillas. These are awesome because they are super delicious, super easy, and they make a super good party trick. You will need a food processor or a high-powered blender. I've made them in both and prefer my VitaMix to get the smoothest batter. That said, the slightly more textured batter that my food processor produced baked up into just-as-good tasting tortillas. (But a smooth batter makes you feel more confident.)
This recipe is just barely adapted from local food blogger/photographer/cooking instructor/author Stephanie Meyer at Fresh Tart. My adaptations are as follows:
1. I got a little more precise about my ingredient weights and a little more detailed about how to coax your batter if necessary (e.g. start with water before adding more oil - I learned this lesson the greasy (but no less delicious) way).
2. Lime zest. Yes please.
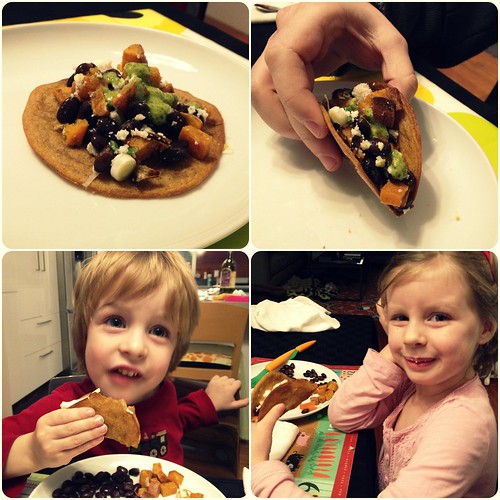
Eat these with carnitas or my favorite vegetarian taco filling: Sweet Potato and Black Beans with Garlicky-Cilantro Dressing. Top with some slaw and queso fresco. The whole family will love you forever!
And also... here's how to peel a plantain (and a glance into my kitchen, to maybe entice you to sign up for a class?... What's with my overuse of ellipses today?...)
Plantain Tortillas
Adapted from Fresh Tart
Yields 12 tortillas
3 large green plantains, peeled and cut into 1" or smaller chunks (check out video above for how to peel green plantains) - note: you should have ~1 pound after peeling, 1.5 lbs pre-peeling
1/3 cup + 1 tablespoon avocado, grapeseed, or olive oil
1/3 cup + 1 tablespoon water, plus more if necessary
Zest of half a lime (about 1/2 - 3/4 teaspoon using a microplane grater)
1 teaspoon salt
1 teaspoon baking powder
Preheat oven to 400 degrees. Arrange racks in the middle of the oven. Line two baking sheets with parchment paper or Silpats.
Add all ingredients to the bowl of a blender or a food processor. Add water to the blender, cover, and puree on lowest setting for a minute or two. Gradually turn speed up, using a tamper if needed to keep the puree moving around, adding a bit more water, one tablespoon at a time, if absolutely needed, to form a thick, very smooth puree. (You are halfway there when you've got a hummus texture.)
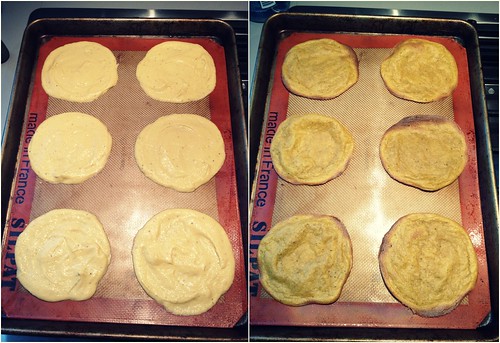
With a spoon, smooth batter into 12 equal circles of thin batter onto the two baking sheets. The rounds should be about 5-6 inches in diameter, and "thin" (about 1/4" thick), but not translucently thin (meaning you don't want to see the baking surface underneath); you need these guys to be thick enough to (a) not burn, and/or (b) not break when you use them for tacos. Bake for 10 minutes, switch racks, and bake for another 10-15 minutes, until just browning in spots.
Cool for 5 minutes before serving. These last okay cooled and stored in an airtight container for a day or so, but you probably won't have any leftover. They go down WAY too easily.


This is so exciting Edith! April and I look forward to taking a class from you in your home! I am just getting caught up on your blog today!
ReplyDeleteThis comment has been removed by a blog administrator.
ReplyDelete